

Deux was modelled using Hard Ops 007 (https://gumroad.com/l/hardops/)
Also shoutout to JayM for helping me out with this even though I was quite upset at the amount of work it was taking.
https://www.artstation.com/artwork/0ErDe
So lets begin! I would recommend reading those two links.
http://polycount.com/discussion/147227/skew-you-buddy-making-sense-of-skewed-normal-map-details
These are a couple of good reads about normals. Earthquake is my hero haha.
I recently got Substance Painter 2 and it was a blast! However I felt the need to do some rebaking to get a better quality product. It was fine for a demo but lets face it. These bake errors are unacceptable in normal situations. So let’s get baking.
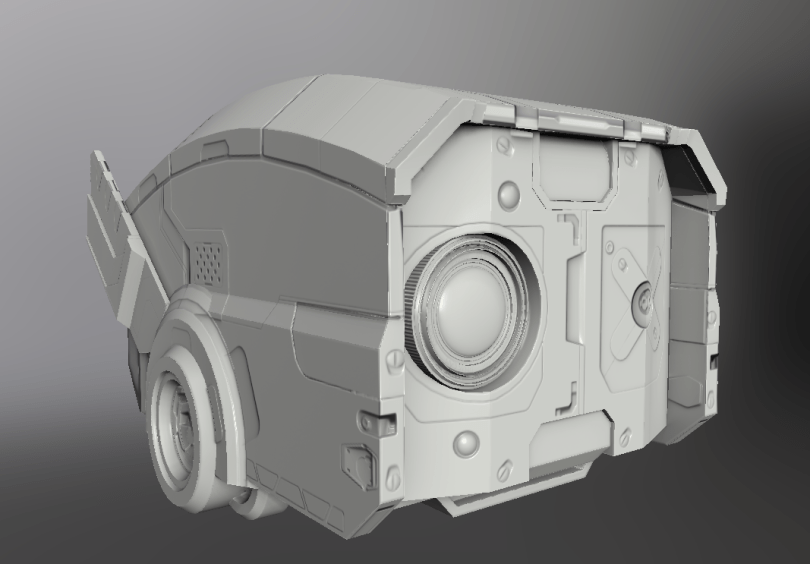
 So in the above image you see the test bake or the initial bake.
The iris area especially took the baking hard. Details are in the wrong areas. Without the color it would be more apparent.

Here you can see the bake in all of its glory. Now for the record. I exported the high. Exported the low. And then just baked from one to another. It’s the easiest way but its not recommended or practical unless you like cleanup. So let’s talk about fixing this.
This is the high mesh. I made it using Hard Ops. After the process you see in the video I retopoed it and uv unwrapped it.

I must admit in the earlier version of Hard Ops I was using unwrapping the highs and texturing them because real geo doesn’t need a normal map. However all the useless interior faces inside aren’t optimal for UV layouts. So instead just retopo.
If you don’t know what to do for retopo you have several choices. Icetools, Retopoflow, RetopoMT the list goes on. However you retopo it doesn’t matter. At the end we have both a high of 404k and a low of 3.5k. So now lets get exported.
The export process is important to how the meshes will behave in Substance Designer / Painter. Usually I’d join the low and send that out and do the same for the high. However to get this to work you must work a little differently.
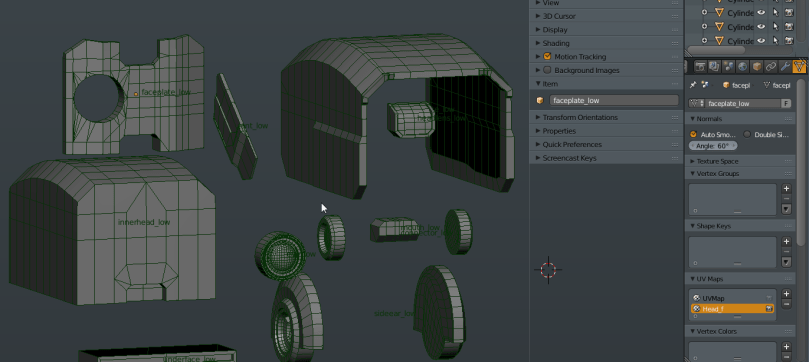
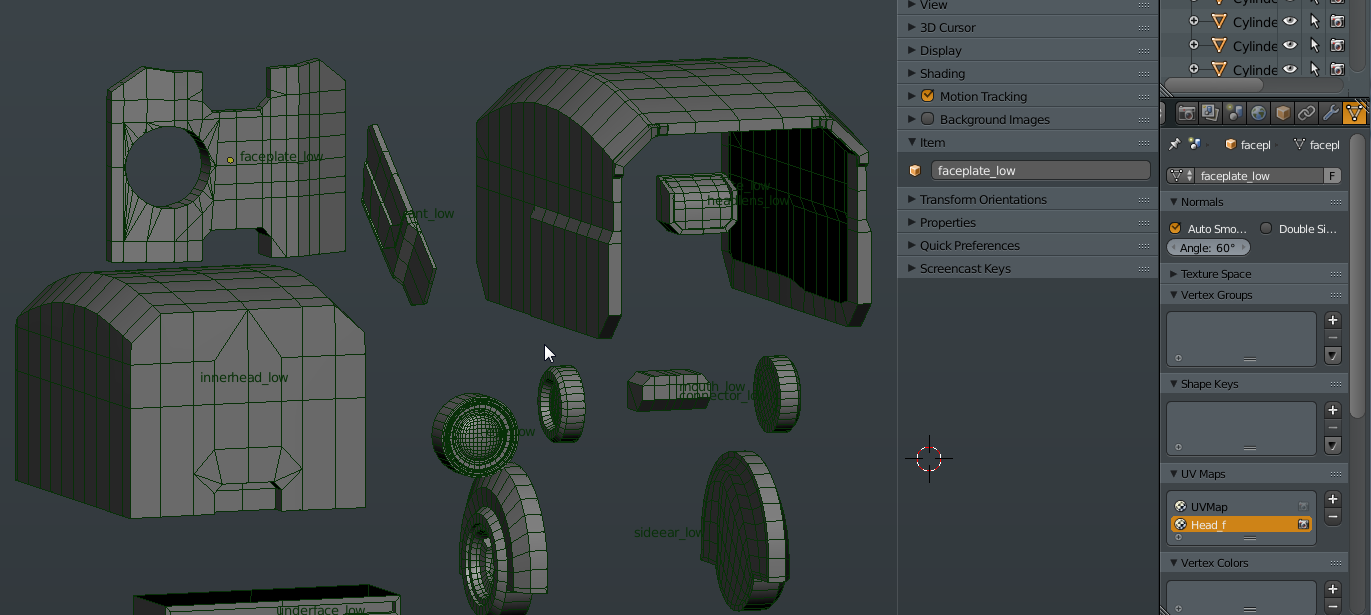
Instead of keeping all the meshes together. I named them all correct names with the suffix of _low. We will be able to export it all as one at the end but in Blender the naming is important.
So now I export the mesh.
So I selected all the pieces and exported it. And that is how I got the low out. Sometimes I forget to resolve all ngons so then I use triangulate to just move on and deal with that later.
Now the high is a little more complicated. There might be an alternate way to this but the way I was able to get it to work after many frustrating hours is exporting each high piece with a suffixed name or _high.
As a note you dont have to do it this way. You can also export it as separate pieces but one OBJ and it will work as well. At the time of doing this I wasn’t aware yet.

So the high as you can see is different components with naming. I just hovered over the text field and ctrl + c and ctrl + v to get the name and export. I exported each piece with the idea of what would bake well individually. So its the same as the low breakup.
So Substance Desginer compared to Substance Painter is a little more flexible with the baking since it’s node based and all. You can do it in SP the same way but I like the additional control for baking and with subsequent rebaking.

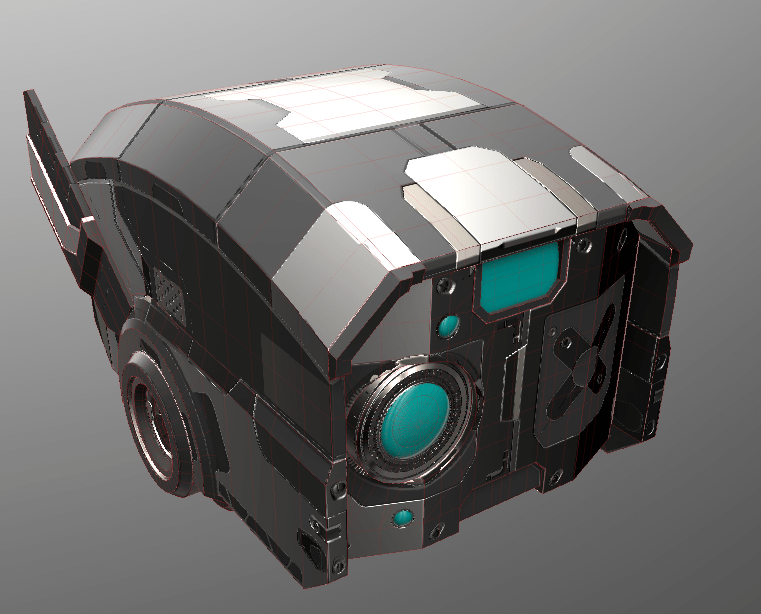
So this was the initial bake. So many errors. It looked fine-ish on the mesh but this is just unacceptable.
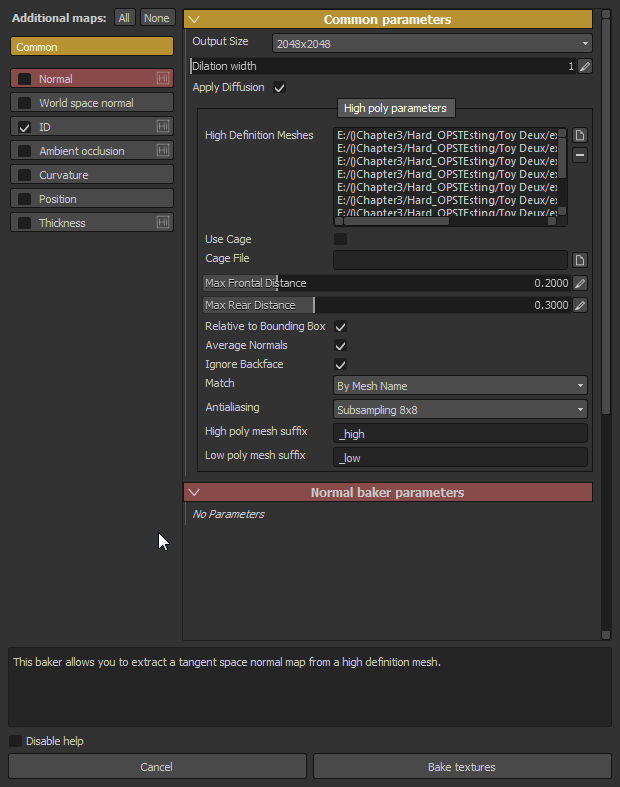
After loading up the low mesh I right clicked it and chose bake model information. And set the following settings.

Because of the way it exported you can see all the groups on the left. You can also see I loaded up a high mesh for every group that is here. I also chose by mesh name under Match and set the AA to 8×8. This could explain why the bake took 15 forevers.

The results are much better. Still some issues but this is much better And at least now I can proceed.
With a bake like this the model is looking better than ever and now I can begin texturing this puppy! Now while the bake isn’t absolutely perfect. The amount of cleanup at this point is almost laughable compared to the previous situation.

I hope this guide was useful and clears up some things that originally drove me crazy. Before I go one last thing.
In SP5 I can’t bake color infomation from the mesh like I can in Substance Painter. The map is just black and I try it every darn time haha. This is the only facet of this workflow that irks me. You can bake color (ID) maps multiple ways for example.
Set highpoly to Blender Internal materials and set to shadeless and different colors. Select the high and then the low and do a full render bake to in blender internal or bake a diffuse pass.
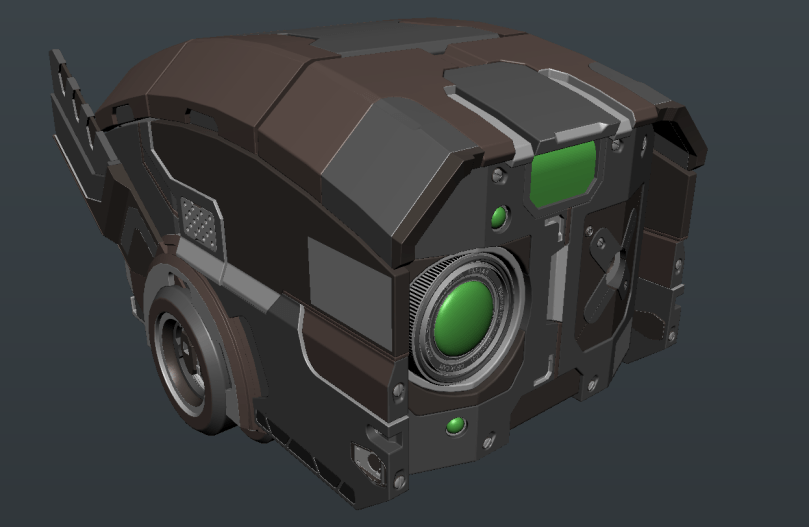
Personally I like using Substance Painter for this. I exported the high with color information in the form of material IDs when I exported it so having that on the low makes initial material allocation much much easier.

Also by isolating the highs in SP we were able to get a nice ID bake too.

Here you can see my starting ID map. This will make blocking out the materials much easier. Hope this was informative!
For the next version of Hard Ops ( https://gumroad.com/l/hardops/ )the goal is to make it more game friendly. I generally do make to’s instead of exporting the high polys since it allows for better uv control and is more efficient. I plan to add more to the playlist about it however hopefully this gives some insight on how I use Hard Ops with Allegorithmic products.
I’ll be adding some videos to the playlist about this in detail however this guide should be a good enough jumping off point.
Ha I can’t stop talking! This plugin was just what I needed and it was made by Pawel Lyczkowski who also made the PUnwrap in HardOps and is a fellow Substance fan!

Get the plugin. It helps name the high and lows accordingly. It made the export process a dream. Also I remapped export to ctrl + ` for this adventure.
Also….
My sensei and good friend Tony Leonard is hosting a kickstarter for his book! I am lucky enough to even have a page in it! Please support his work.
Anyways thats it!
