Boxcutter is the darling of Hard Ops. It’s the thing we mess with when we want a break from Hard Ops. (redacted) I want to make this tool unique. And this version takes us a little closer to the next level of cutting.
I am pleased to announce Boxcutter 6.5 Symslice.
Gumroad Customers: The top file is always the latest version.
Blender Market Customers: the file….
Here is what happened in the last version. MaterialScythe
I will go over each of the enhancements you can expect in this version.
View Alignment V1 –
It’s v1 because this is just the start.
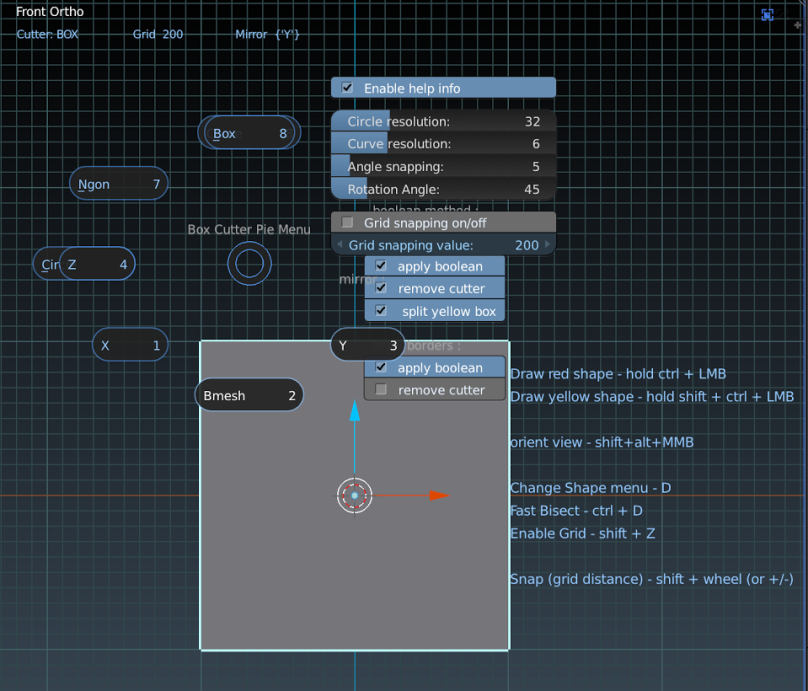
When you start boxcutter there is a border. If you press alt + shift + mmb on a face. The view will align to that face. This is something I wanted to add to hard ops as well but differently however that may come at a later time.
This tool is invaluable to making angled cuts and and comes in handy for alignment related issues. I use this all the time and cant wait for it’s next level.
Mirror –
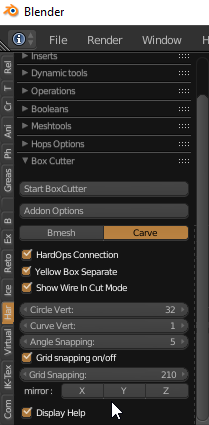
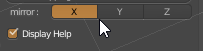
Boxcutter now has mirror. This is a big enhancement and was a welcome addition to Boxcutter. In the D menu you can select the axis (holding shift) and select multiple axis.
Before I would cut on one side and mirror to the other using Hard Ops (alt + x).
Enabling the a mirror axis on the D menu will allow mirror cutting.
Non Destructive Changes –
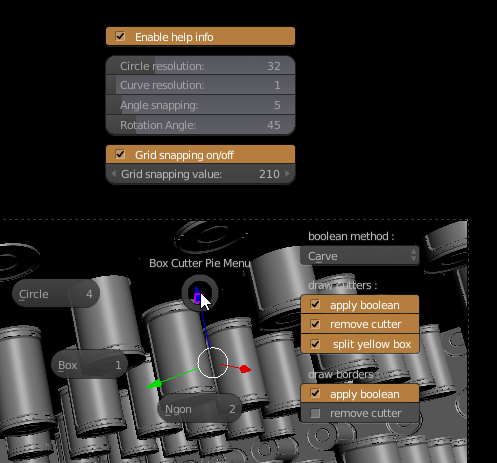
There have also been changes to the format of the D menu. This should make it easier to understand / use.
Rotation –
Pressing R during drawing will rotate the object the amount of degrees specified in the D menu.
This was also in the last version but has been improved for this version.
Additional Notes –
logo fixes
Hard Ops connection improvements
faster boolean method than previous
fix for cutting to cursor in local view
fix for cutting with distant origin
bugfixes
Support Notes –
There appeared to be some issues with this release due to changes between Blender versions 2.78c/2.79/2.8.
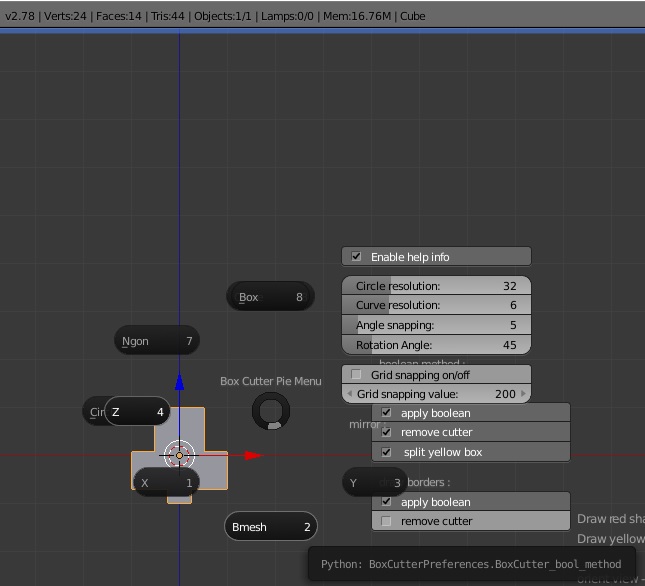
Sometimes pressing D will get you a menu like this.
If this happens there is a hotfix version released(4/30/17) to markets containing an additional option.
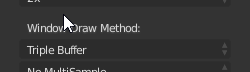
There is also a known issue where the menu can have issues refreshing and displaying correctly if the window draw method is not set to triple buffer.
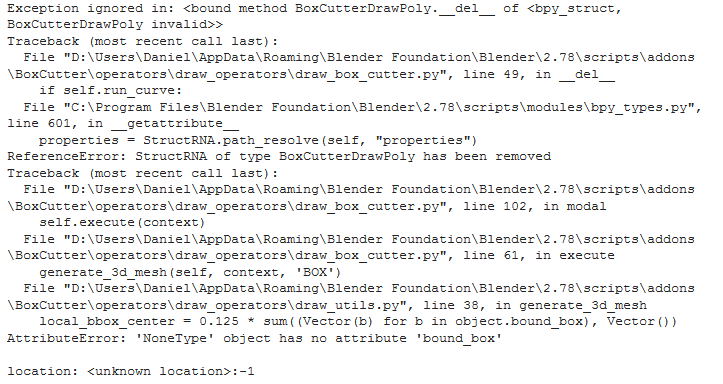
When drawing a box I get this error.
Reinstall boxcutter using the latest fix from the sales page. This is a resolved issue.
Unable To Install –
Do not use install from file. I recommend installing things as per the 008 guide. Just put the contents of the zip in your add on directory. Replace the previous folders or rename them to keep classic versions.
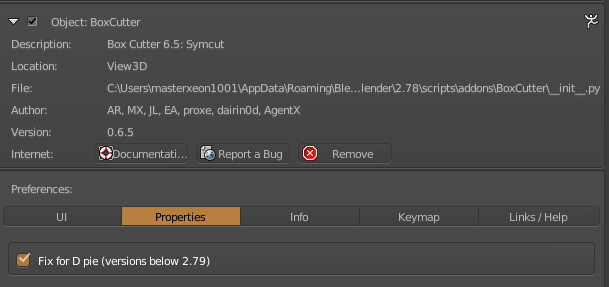
Pie Not Showing Symmetry –
If you use fix for Pie. This will require you also utilize the T panel for symmetry.
This is due to differences between blender 2.79 and 2.78 and lower and the support the pie menus now have. I apologize for the inconvenience and hope this becomes more normalized come 2.79 official.
There is more in the release_log.md in the zip file.
I should mention here booltool is no longer needed / required for Hard Ops. We support it however certain features require it not be enabled.
After the release of Hard Ops 0087 we immediately got to work on the next version working to unify things on a level that makes the workflow easier to explain and use. I plan to release videos for this version when possible to help explain but I will attempt to in this update log.
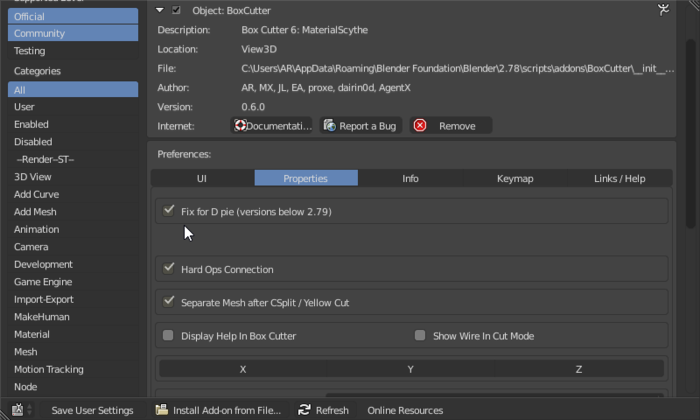
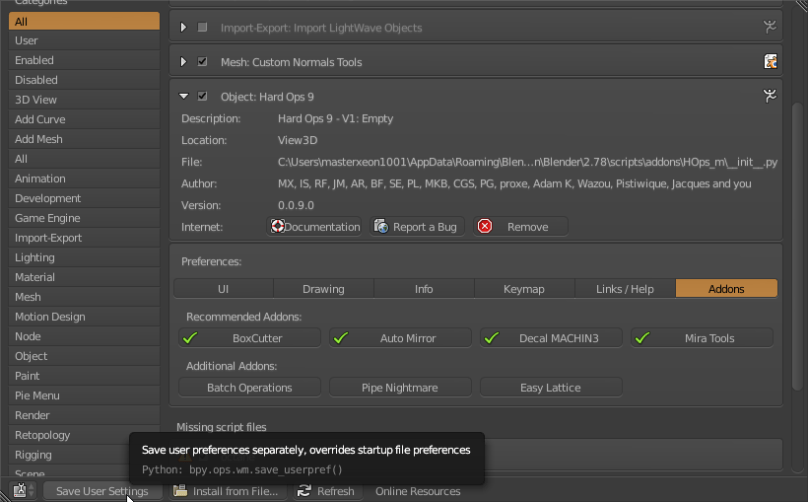
Let’s begin with the Hard Ops preferences in the add-ons panel.
Add On Prefs –
The hotkeys of Hard Ops are now listed in the preferences. It is recommended to uncheck them to disable them. (Do not click the Xs). This shouldn’t be needing any adjustments and is experimental.
The addons panel and which ones are recommended is also updated .The main change is the decalMachine. Clicking the Hard Ops link will get you a discount on the product. To find out more about decalMachine check this link to find out more.
There is also a Modal Scale for making the modals work at larger scales but we will go over this in its 2nd location. The misc menu of the Hops Helper (ctrl + `)
Ok so with the addon prefs aside lets get to the T panel. The Hard Ops learning tab is there for users to find out more on how to use Hard Ops and get help.
I hope the learning tab can be useful in helping more people get started with Hard Ops.
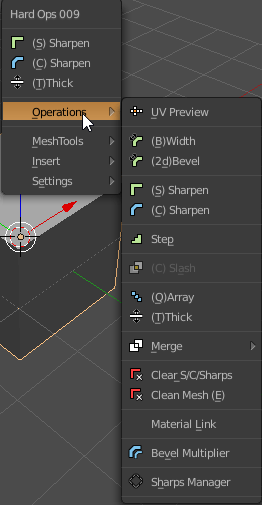
The Q menu has went through some changes. As you can see all options are listed however the context. For example merge and cslash (formerly rebool / cslice). These options are particular and will do nothing if the context is not correct.
But another thing to note is Cstep / Sstep / CBake are gone. The cstep / sstep workflow is now simplified into the Csharpen / Ssharpen / Step workflow.
Basically Step will bake the bevels and set up the bevel modifier in addition to putting the mesh in Cstep mode.
To demonstrate this in action. This is the normal boolean / Csharpen behavior. Just perform a boolean action and press Q and Csharpen. Also note the boolean object became sstatus: boolshape. This give the boolean object a special q menu. I bevelled using a neutral bevel instead of csharpen bevel due to the cutting of weights into geo is not recommended.
To take this a step further lets Step and then do a boolean and Csharpen again. Then use Step to bake the previous bevels and then adjust the bwidth of the new bevels. This is not much of a departure from the previous workflow except now ssharpen and csharpen work with cstep meshes. So the other operators were not needed. This should make the learning process easier for beginners especially.
CSharpen and Ssharpen now work on multiple meshes. As does Bwidth.
This isn’t even the best part.
This is.
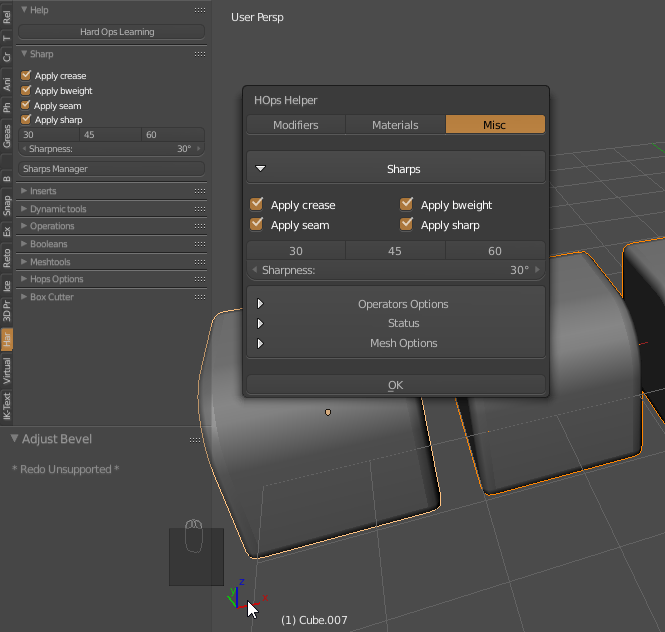
In the T panel and (ctrl + ~) Modifier Helper is an Sharp tab. This allows you to set the sharpeners S/C and step’s angle parameter. This can be useful in cases where you need a higher number before doing an operation. This makes the Hard Ops workflow much faster and easier to work with. Here is an example of how it can be used.
The easiest way to explain what is going on is.
Bwidth to show the bevel is still live
Step to bake the bevels
Changed Sstatus to Csharp for emphasis
Ssharp with 30 degrees (this bevelled the bevel with is undesired)
Changed angle using Mod Helper Sharp area to raise to 45.
Bevel is no longer effecting undesired edges because the limit is 45 and not 30
Bwidth has also seen some enhancements. In addition.
You can use Bwidth to turn off bevel modifiers by pressing V. In fact pressing H will show help. This is for all modal operators.
There are even more enhancements beyond this that I am sure am missing. On a technical level they perform even better with heavy scenes than before however with so many changes I expect glitches.
Reset Axis Operator –
We added an option to reset an object on an axis.
It comes in handy for orienting things on the x axis which is it’s main purpose.
Sharp Manager –
This was also an important feature that I am quite pleased with.
In short. This will convert sharps to seam / bevel mark / sharp / subdivision crease. This can be useful when using subdivision to block in a model and then applied and used with beveling which I do alot.
This panel looks complex but really the top is all that matters.
In my typical use cases I am holding shift and clicking sharp on the left side and selecting all the options on the right side.
When using subdivision block in and applying it via alt + c or clicking on the apply button of the modifier all the ssharp edges get converted to sharp edges so the converter just converts them back.
Modifier Helper –
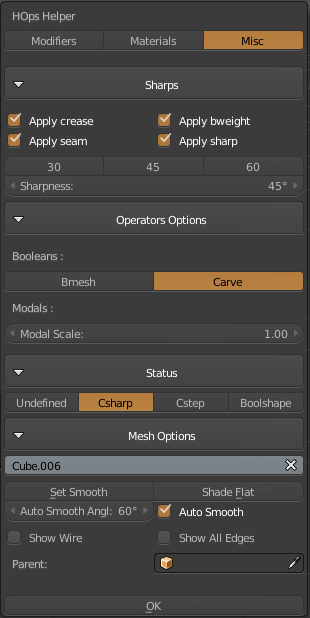
The misc tab has been populated with options. This will be useful for using this in full screen mode and accessing quick options. In this screen all options are expanded for effect. I’ll go over what they mean.
Sharps (covered previously on page)
Operator Options
Bmesh / Carve (this will change the behavior of booleans in Hard Ops)
Bmesh is nicer but less stable / Carve is completely stable but gives undesired edges alot of the time.
Modal Scale – Sets the modals to a multiplier for working with meshes larger than usual or smaller. This is ideal for scale modelling or accuracy.
Status – sets the sstatus of the mesh. Replaces sstatus override.
Mesh Options (options for dealing with a mesh and smoothing)
Set smooth / flat shading / autosmooth angle and enable autosmooth.
Show wire / all edges. For times when wire must be enabled or disabled
Parent – just a test
There is still more we plan to do with the helper. It has opened the door for a whole world of functionalities. The modifier helper concludes a 3d long dream of being able to mess with modifiers without the panel.
The material helper is also working better than before.
Cutting Material is where you can specify a material to cut into another object.
This was covered in the last version where it made its debut.
Bevel Multiplier –
Sometimes when I finish a model I want to divide / multiply all the bevels present. This option fulfills that need. All selected objects will have their bevel width multiplied by two. Or divided with the checkbox which can also add some realism depending on context.
Sstatus Logo –
At the top of the screen it used to tell the sstatus of the object however this proved to be confusing to this has been replaced with a discreet logo for notifications. I want to expand its uses however this is the initial implementaion.
Someday it will do something in addition to be colored for notifications but that is for down the road. It is barely visible when the mesh is not in a sstate from Hard Ops. This should provide some assistance to following future tuts and understanding the upcoming “modes”.
Renderset 1 –
Renderset 1 is my default render setup I use for tutorials and basic rendering. It has been expanded to use filmic.
This is just the way I render and can help with setting up renders. GPU recommended.
Edit Mode Enhancements –
MDisp – Mesh Display –
This will hide ssharps from showing in edit mode. This was requested a while back.
Only a visibility change. No sharps are affected.
Edit Sharp Global –
If you need to adjust what edit sharp does the T panel allows this. You can also set it in the (ctrl + `) modifier helper.
Other than that there were no other notable edit mode changes at this time. Things are planned however but planning is required.
With that I conclude this update log and can’t wait to show whats next for Hard Ops. This has been a steady refinement over time and not a day goes by where we aren’t discussing what next to do with Hard Ops. I am honored to have received so much support over the course of the project. The community keeps this tool alive.
Also if you are curious of the official changes internally there is release_log.md file you can open in any text editor or even blender’s text editor.