Hard Times And Even Harder Surfaces – Chapter 6 Demo / Timelapse

Chapter6Title1

Double Post Day!

In this chapter I want to go over something that I was taught recently by a craftier modeller than myself. And that man is Adrian Rutkowski.

Vitalii “Fructdw” Vlasov recently pointed me at his gumroad collection of assorted kitbashing elements and after checking them out I was blown away. For that I thank them both for this knowledge keeps my gears moving and knowing that there is always a better way.

Free Kitbash Set

https://gumroad.com/adrianrutkowski

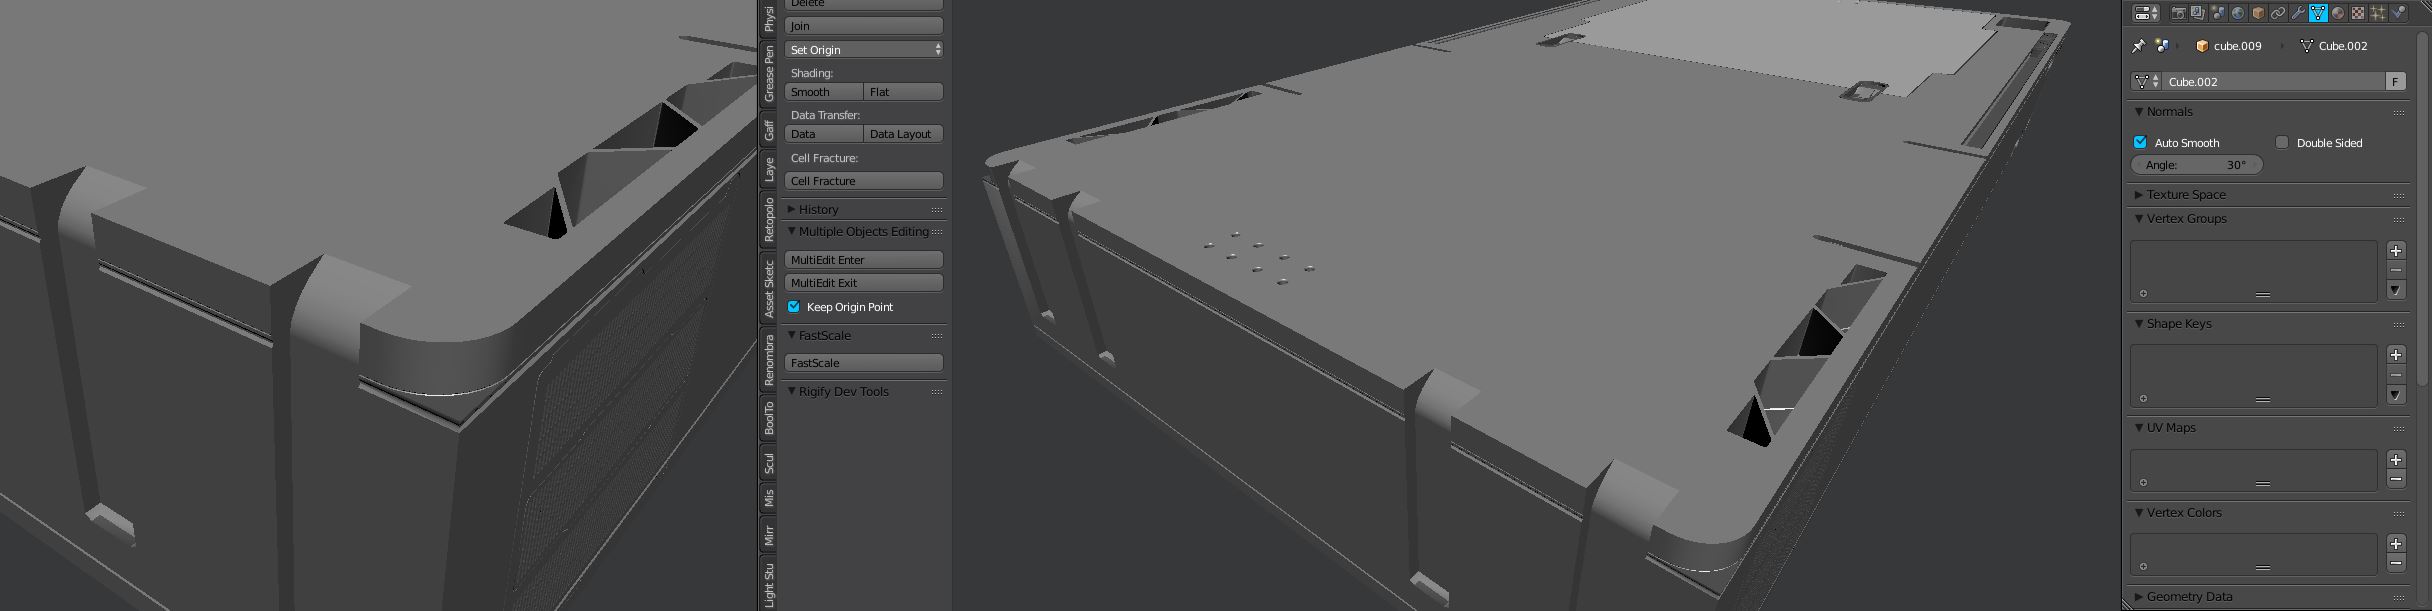
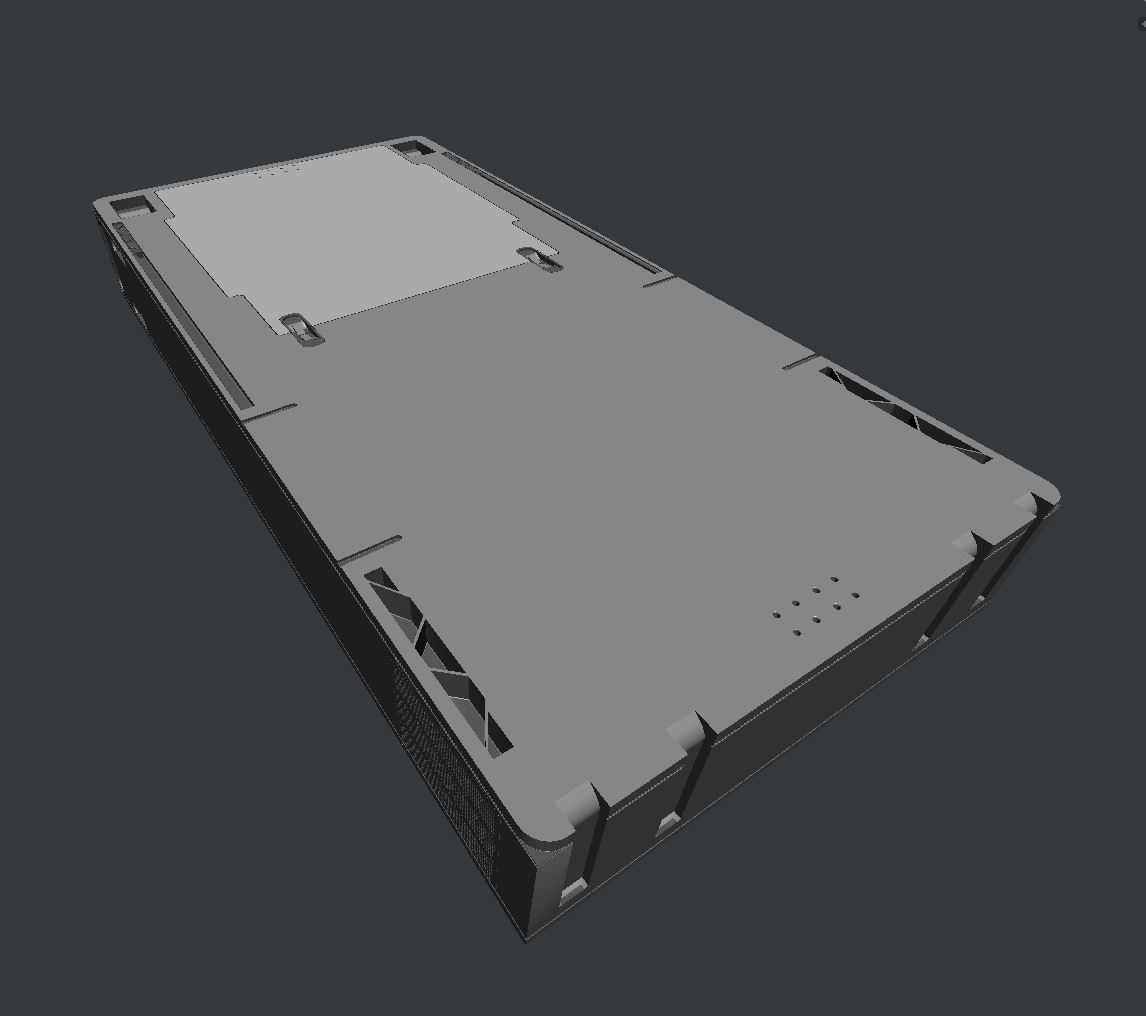
The alternate ways that artists manage to make the tools work for them versus my ways and habits is always a welcome thing to see. Concept artists in particular are what I call “dangerous”. They enter 3d with a multitude of skills and an artistic eye that can’t be beat with pure 3d studying (or at least for me). I see so many concept guys open the door walk in and immediately begin killing it. I must admit I was nervous when I first saw how finely crafted and modelled each piece was. My first thoughts was that cad software was used and that these parts were not possible to make with precision and care to the edges and normals in Blender.

Now before we continue I also want to add. Forget topology for a moment. I know you’re gonna say, “What about UVs?” “What about deformation?” “What about sub-d?”. Lets leave all that alone for a moment and focus on just the shape and the form. In the end that’s what viewers see. Only us 3d folk see the topology and mapping. So if you want to clean up non subdivision parts be my guest but a concepter would craftily figure out a way to make it through the project without the nuances of technical holdup.

This is a timelapse demonstrating the techniques discussed in Chapter 6 of “Hard Times and Even Harder Surfaces” which is a patreon exclusive during development. Subscribe for this chapter and upcoming ones over at Patreon!

http://www.patreon.com/masterxeon1001

Also I wrote a blog post about freebies in the community worth picking up.

https://masterxeon1001.wordpress.com/2015/09/03/free-stuff-worth-checking-out/

All of them have freebies so go check it out!

Even I do! So pick up Blending Away The Pain if you haven’t already!
https://gumroad.com/masterxeon1001

Also I have been working on making finer and finer hard surface assets and if you get the asset collection you can check them out!

https://gumroad.com/l/assetcol

Image2

]

Blender/3d: Custom Normals

In this blog post I wanted to go over custom normals for hard surface creation. I plan on keeping it short but still I find this essential nonetheless. Custom normals exist in most applications and is essential. Maya users are familiar with the process of hardening edges and softening them in addition to locking them down. For this quick post I wanted to discuss ways in Blender to get smooth shading without all the fuss of horrible looking edges or exact tweaking.

CN1

The first image above shows the mesh on flat shading without any smoothing. While it looks moderately acceptable, for the baking it will show unwanted faceting and make the normal/height show stair stepping that would be undesirable for the final result. When I click set smooth all my problems come to light and show the roughness of my workflow of booling insane amounts of shapes into a planar form.

CN2

Funny enough. Before custom normals were added I used to fight with this so much and would use the split edges modifier to make life easier. This also increased the vert count substantially and made the mesh denser than the process of making it which was also a bad thing.

In the object tab there is a normals tab where you can check auto smooth and set an angle as well as turn on double sided (which isn’t needed). The default angle is 180 which isn’t going to show any difference however once you lower it down to either 30 or 60 the normals begin to look much better.

CN4

The final mesh is now ready to be exported / baked or whatever I plan to. To set manual edges you can press ctrl + e >> mark sharp. This will sharpen the edge similar to how Maya has Normals >> harden edge. I use that as well for shapes I boolean into other shapes and the amazing part is the sharp edges translate well into the subsequent object along with vertex paint, materials and even UVs.

CN5

But that is all for this tutorial on custom normals. I hope this helps you in your hard surface endeavors. Also be sure to check out my latest tutorial about modelling sci-fi floor pieces using the mesh subtraction kit.

I’ll leave you with one more image showing the process on a basic cylinder to help drive the point home.

damnJordan

For being cool enough to read my blog I would like to also throw in a free floor! You can check it out and see the custom normal smoothing in action! Thanks again!

https://www.dropbox.com/s/rslorvtw9xnl1am/FreebieFloor.blend?dl=0

Also… the default cube of the future.

https://www.patreon.com/posts/3032558

UltCube