Boxcutter 719 – Seax Release Log

Boxcutter has been through quite an adventure and while the new feature list is short, I felt a moment of reflection was needed to get everyone up to speed on Boxcutter as it is now.

Boxcutter, like Hard Ops has many nestled threads and interconnected paths of tasking to dictate the next level and provide adequate functionality for every step. One of the paths is the “Classic” path which encompasses the legacy feature of old boxcutter that still has not been remade in the 2.8 era.

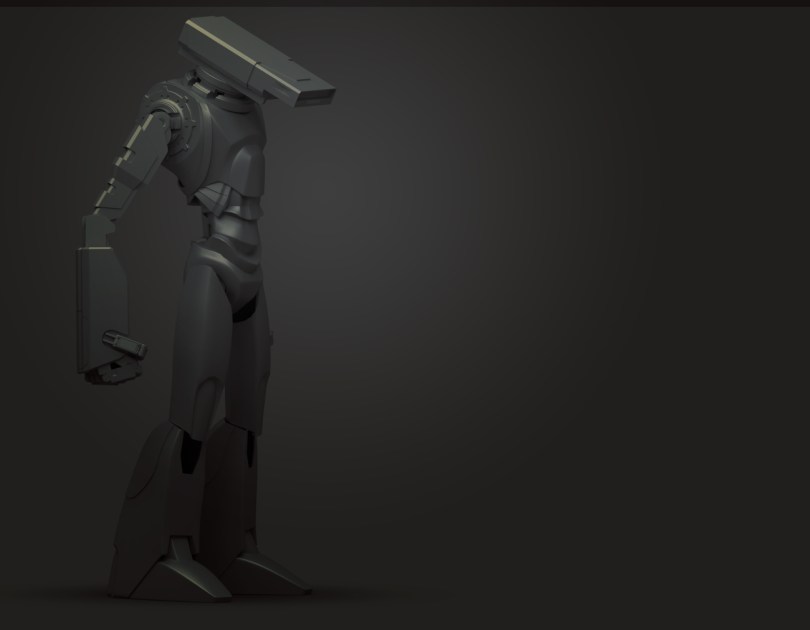
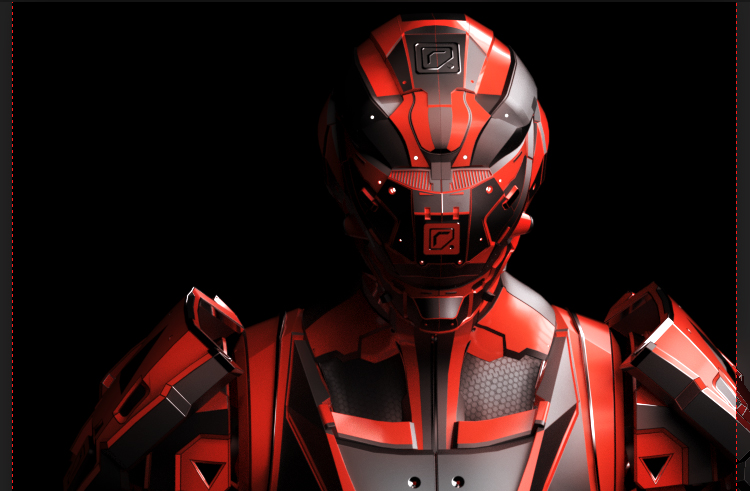
This release is kicked off by the return of a fan favorite legacy feature finally up for remake in this generation. With formalities aside I am happy to announce the release of Boxcutter 719 “Saex”.

A release log was prepared to kick off this event.

Installation is the same as always.
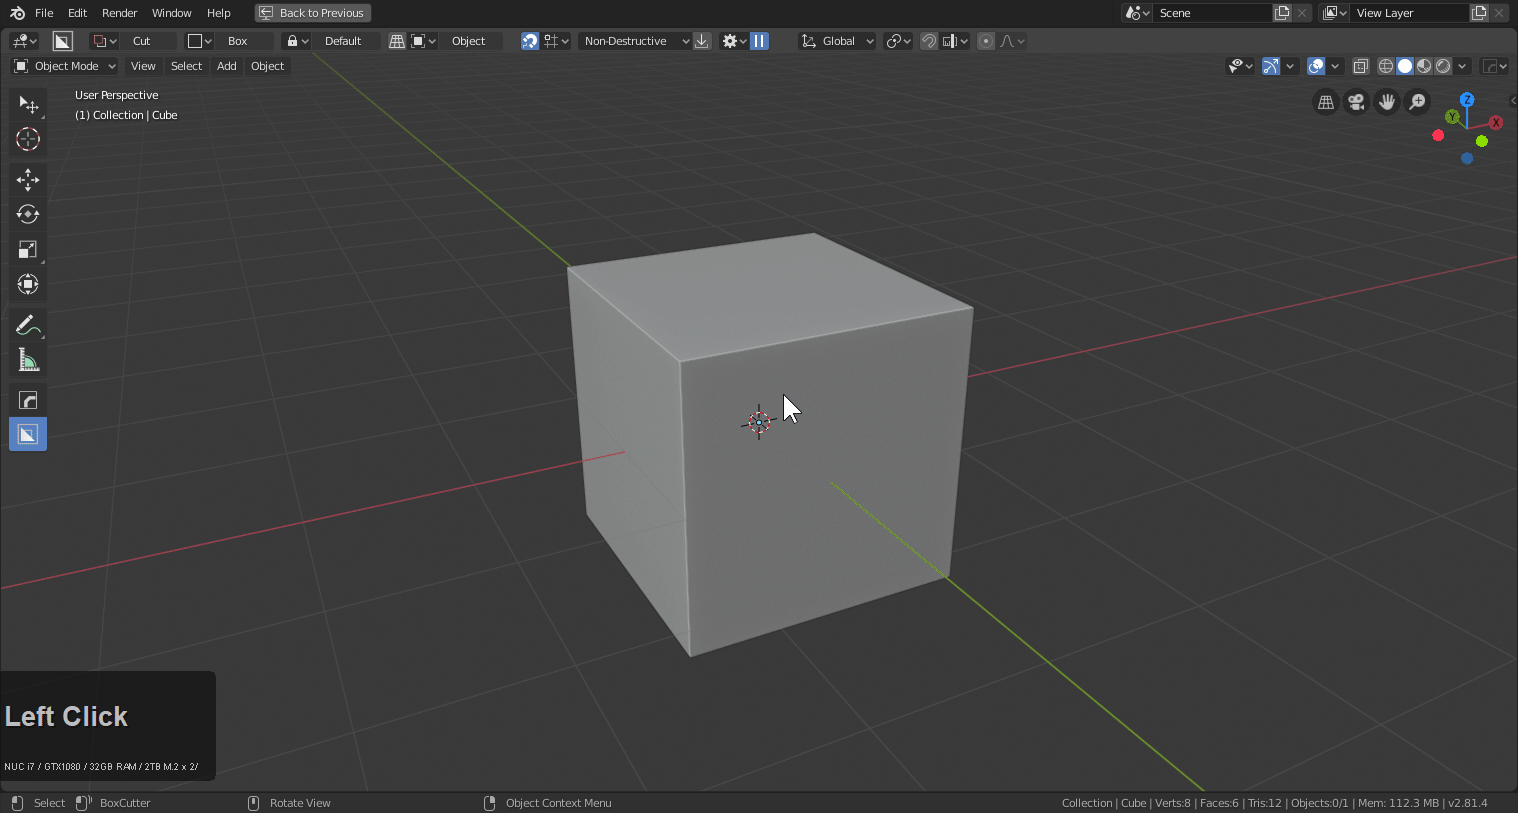
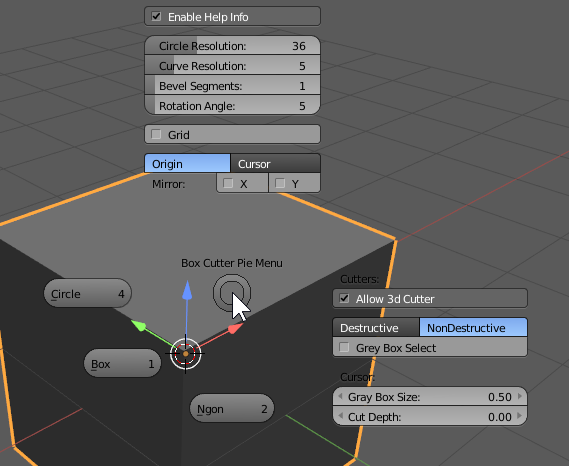
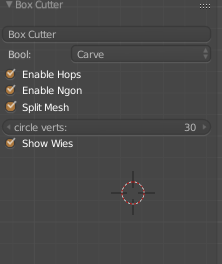
Boxhelper Default

The Boxhelper is now default. To those unfamiliar a video was prepared.
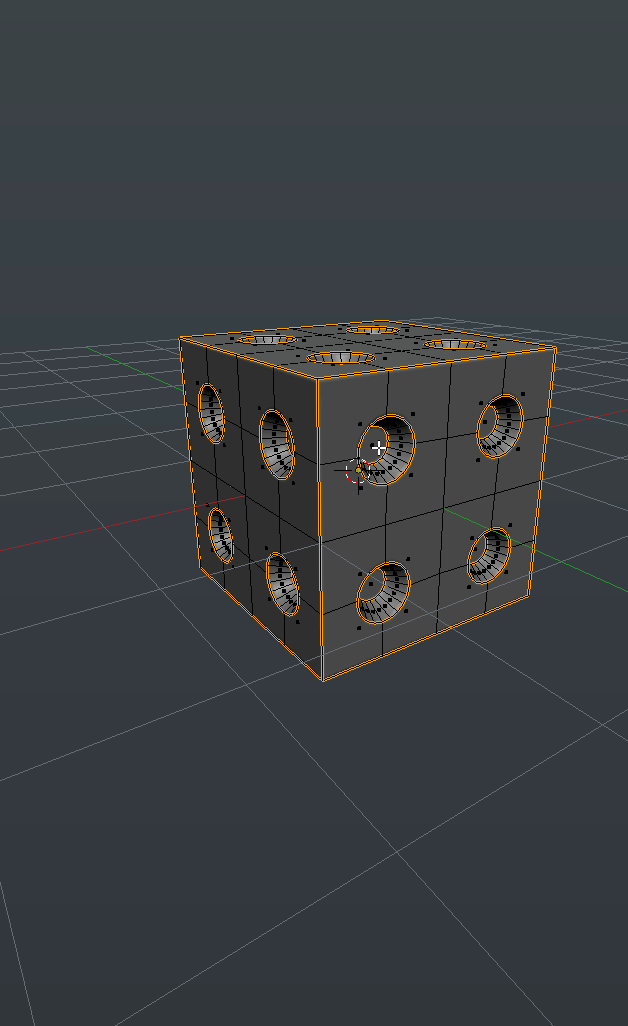
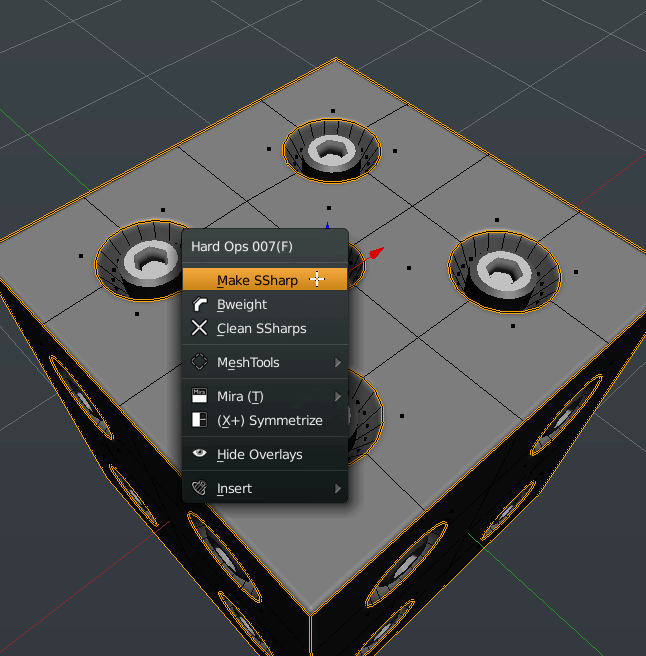
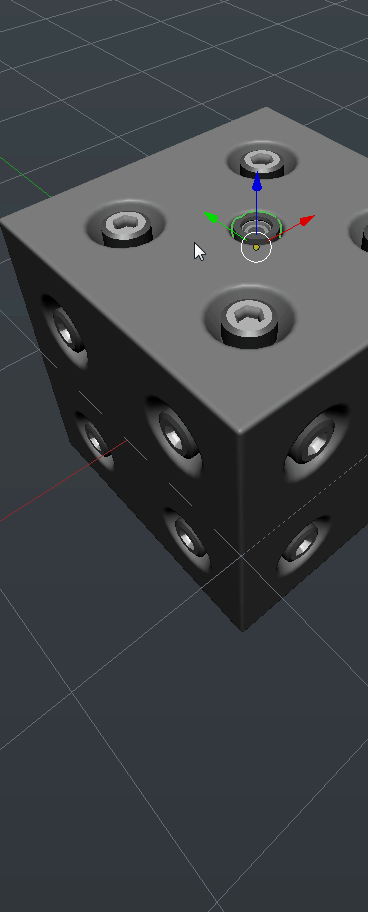
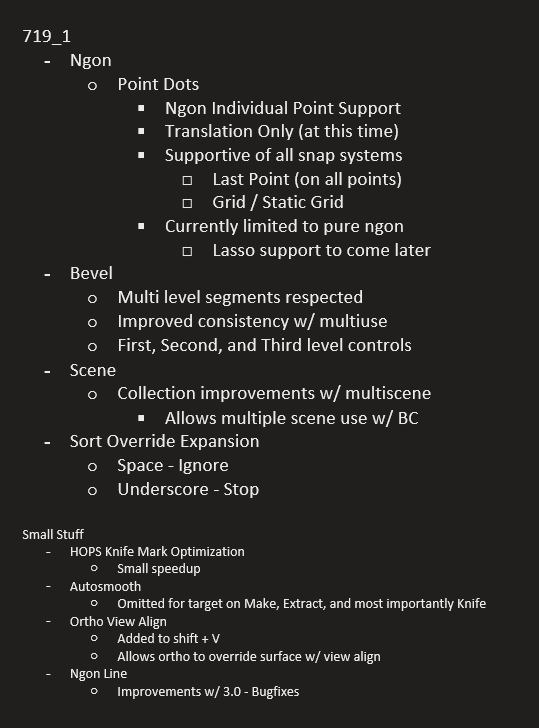
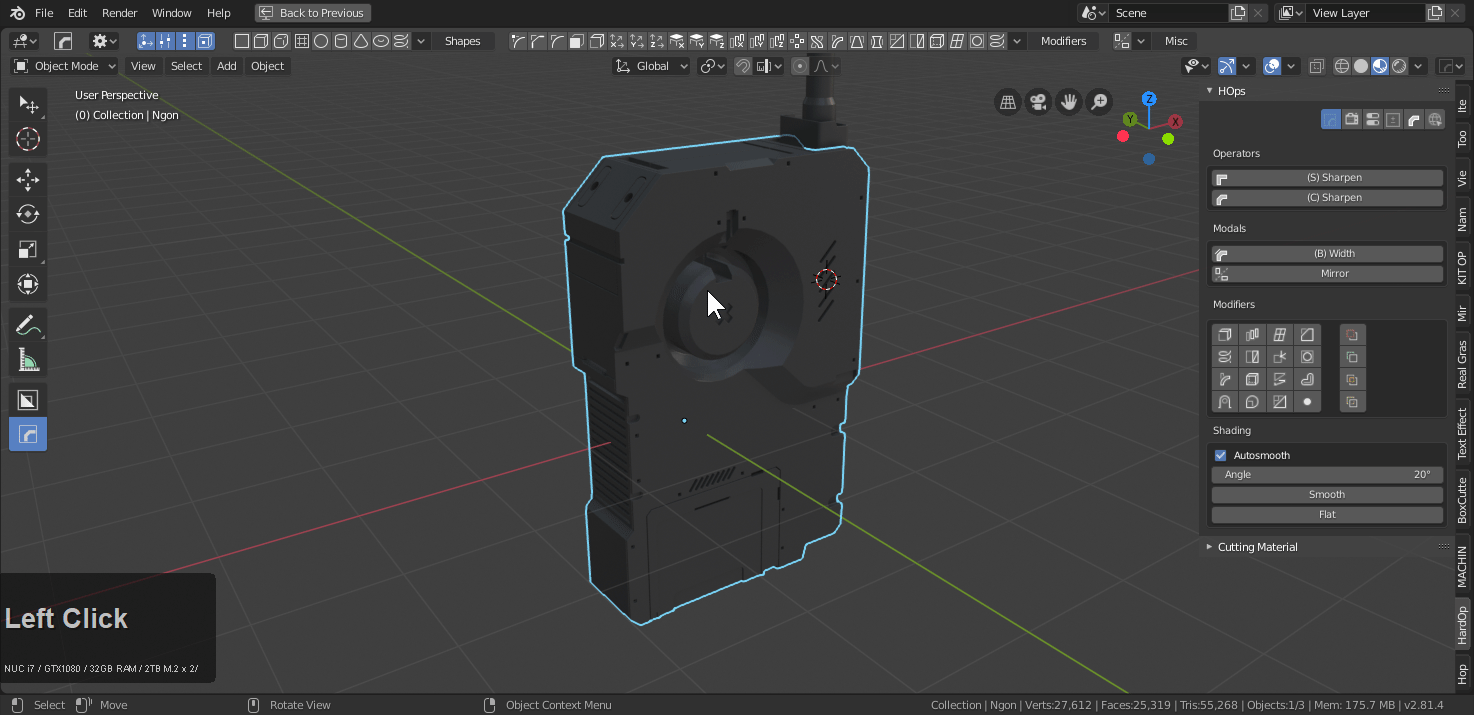
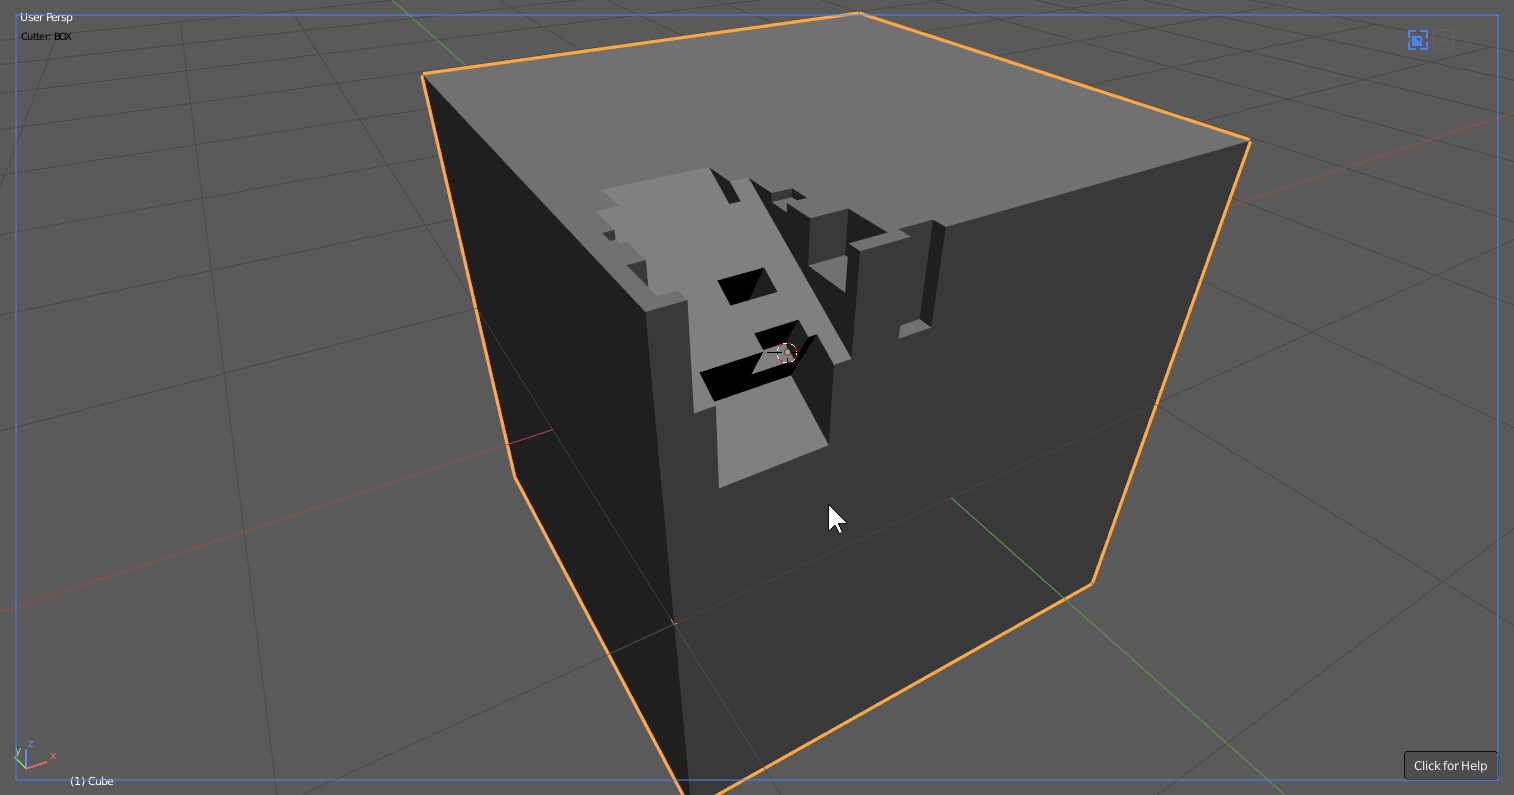
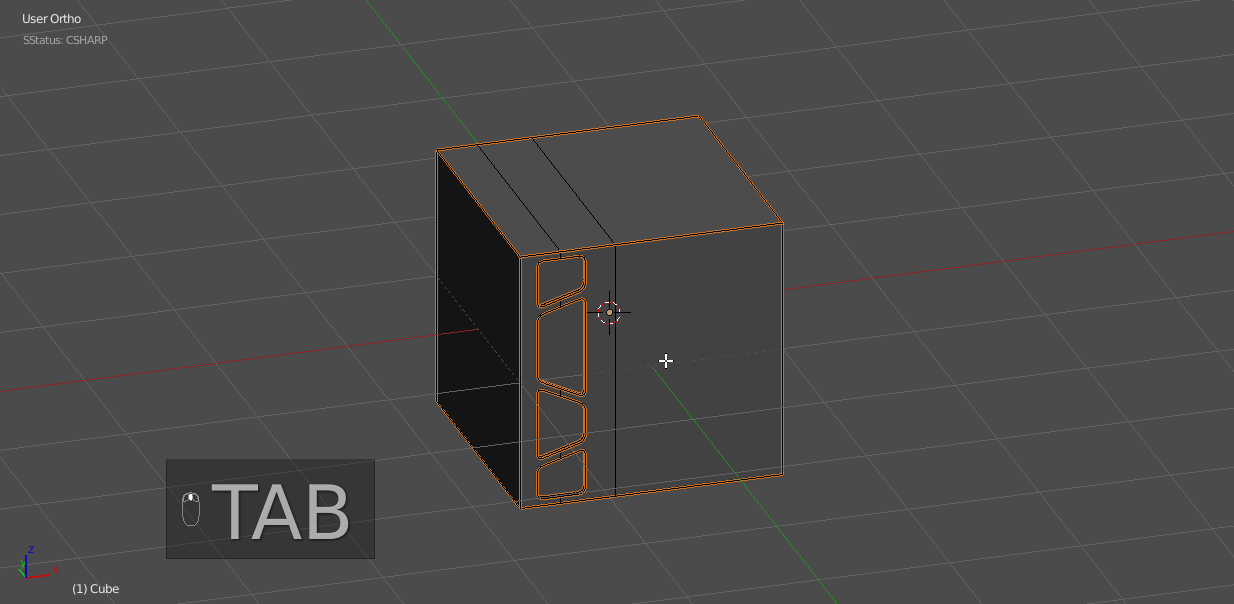
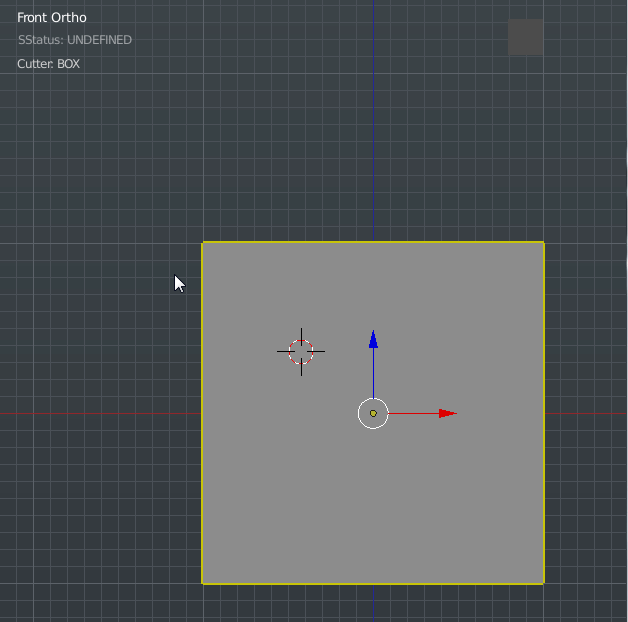
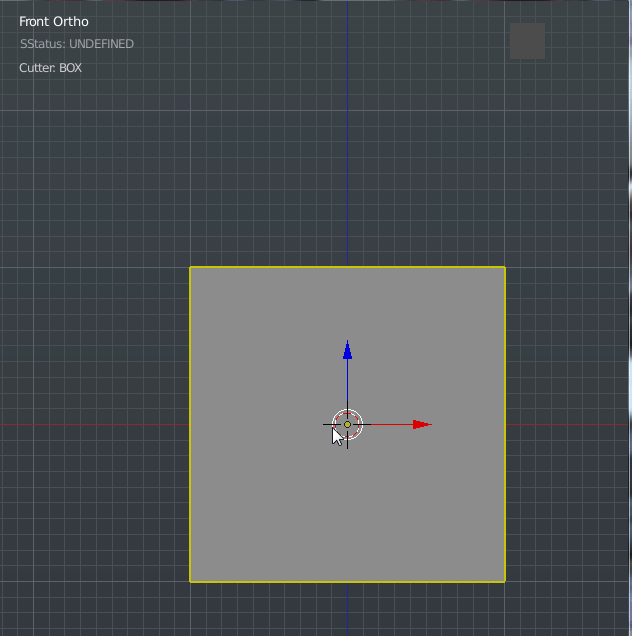
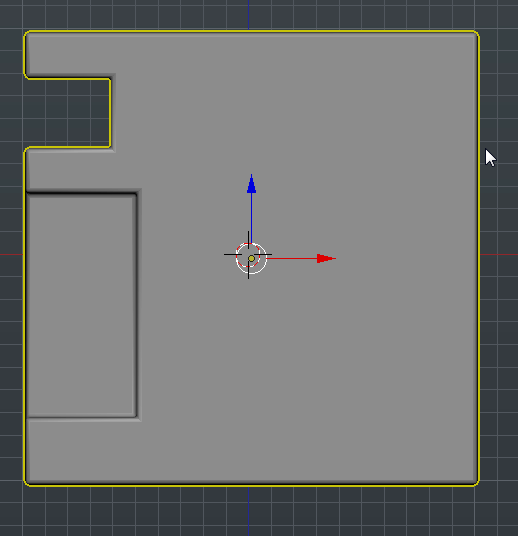
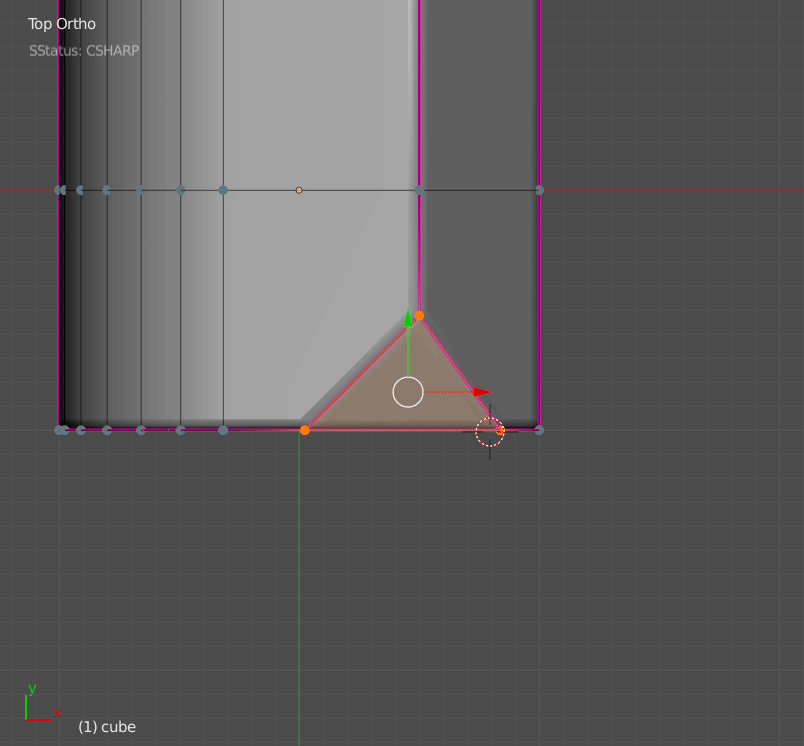
Ngon Points V1

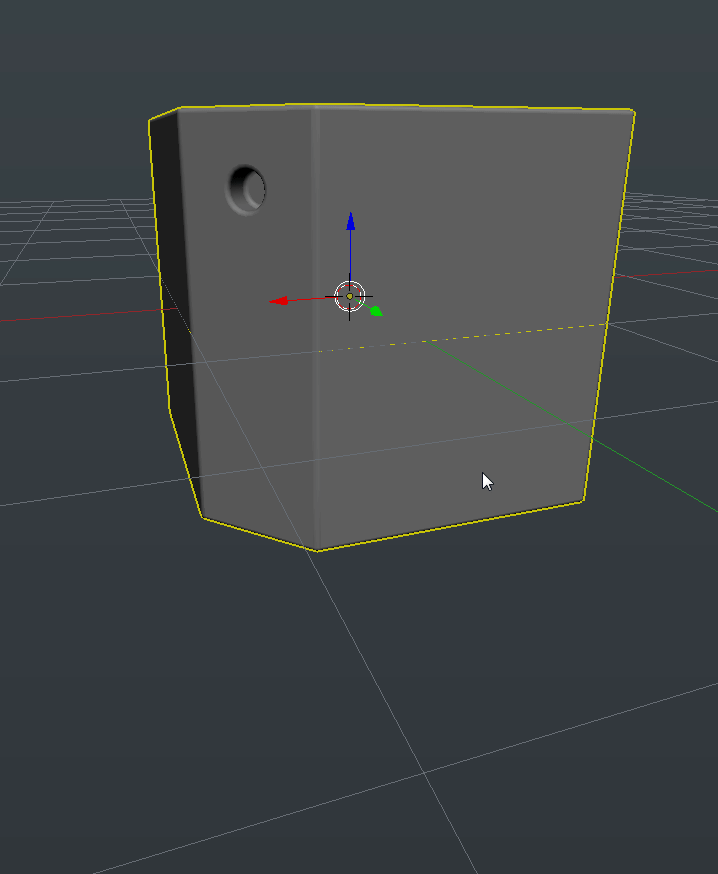
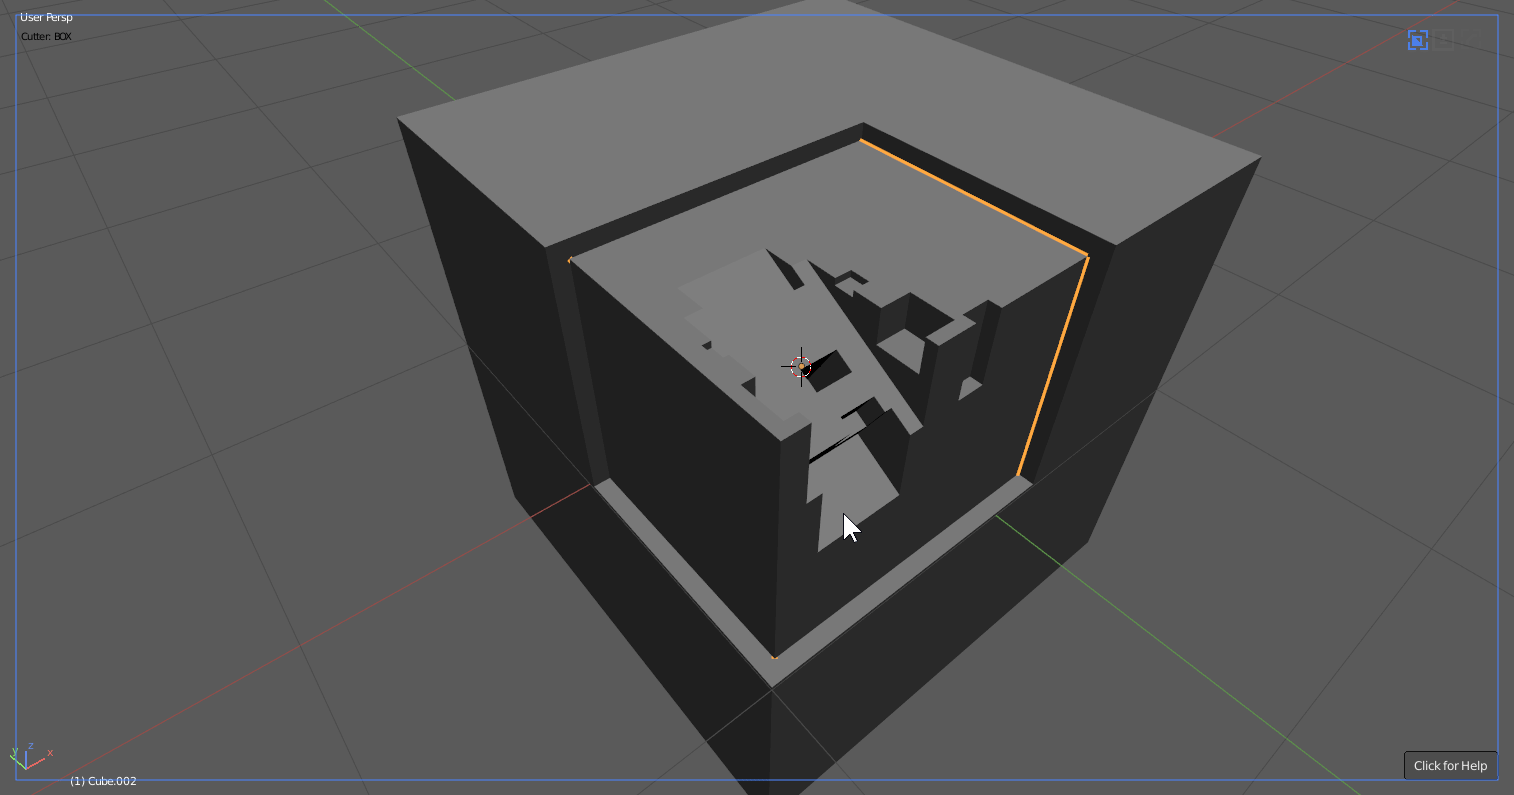
Ngon points was one of the most popular classic features of the past that is now brought back into the current time. Anytime during ngon pause or tab will show points allowing for translation.

Translation was the focus of this V1 of ngon dots.

Lasso point were also omitted from this round due to unique rules.

Bevelling points will come at a later time. It was just too much to crunch on for this round.

In the video above it can be observed that last point is supported but it also supports grid both dynamic and static.

Deleting points is also on the list of things todo. For the goals envisioned ngon will need a special edit mode. But for now the goal of translation is the purpose of this release.
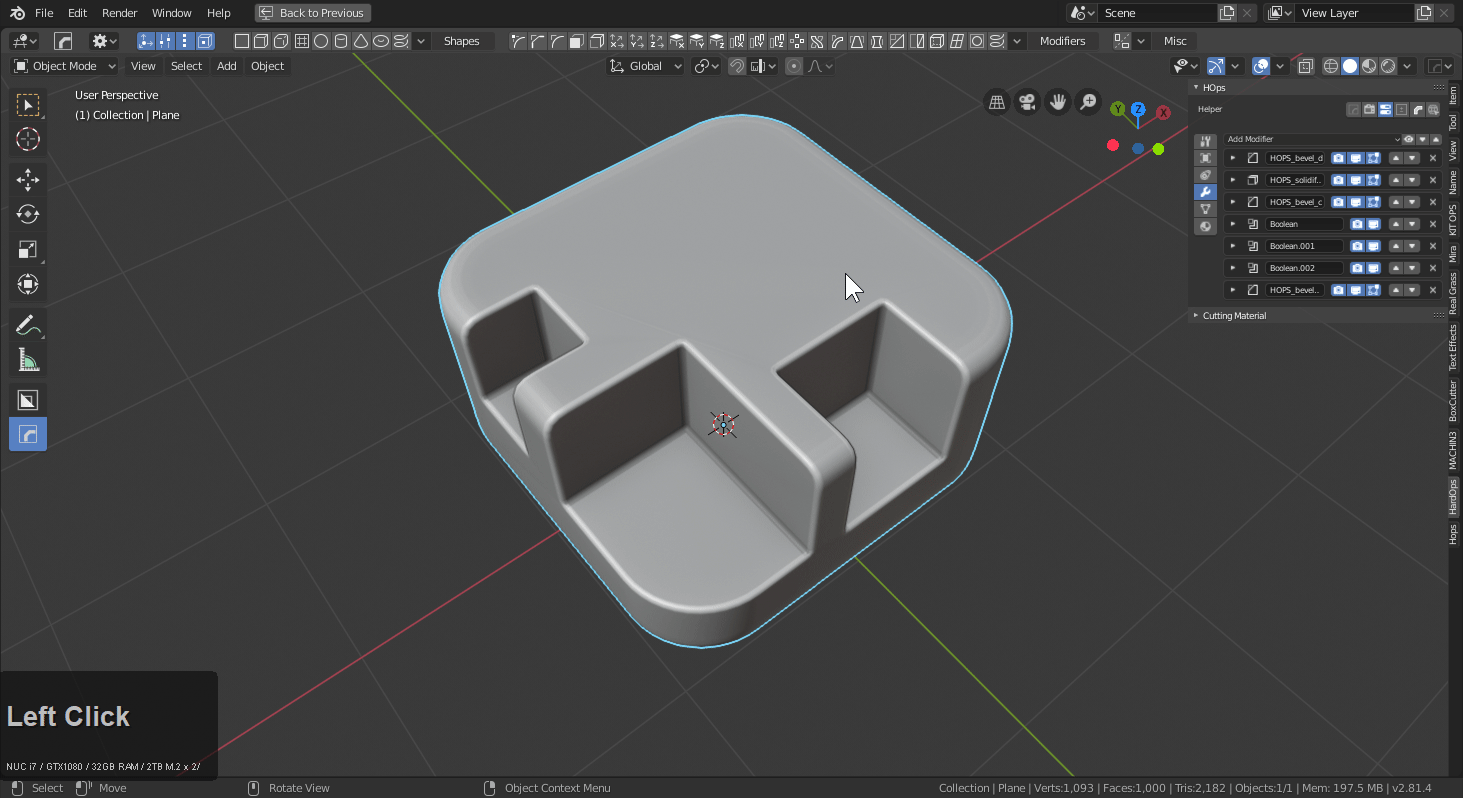
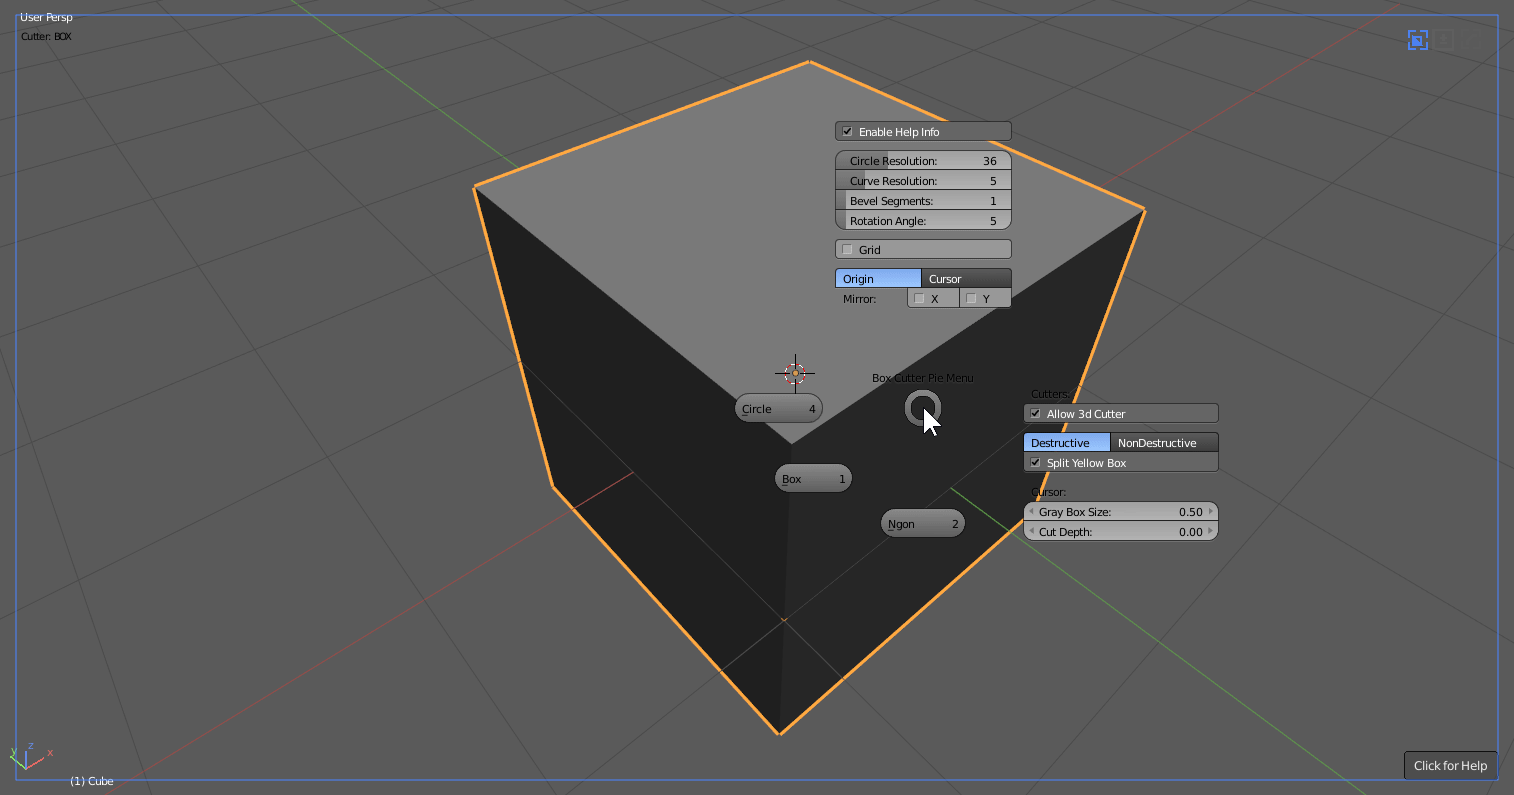
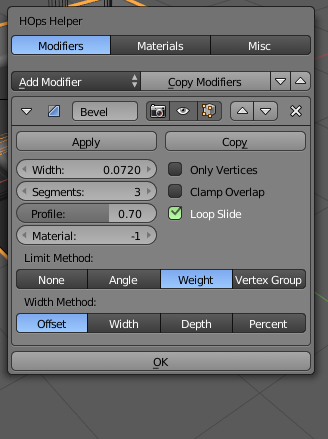
Bevel Management

Bevel management refers to how we behave with multiple bevel mods in boxcutter in this case. Previously the segments would be rather random and not able to be respected between uses. This drove me nuts and I am happy to say it is much more logical.

It’s small but I just needed a little sanity with bevel and multi use to reduce keypress overhead.

Multi-Scene Improvements

Collections required a degree of improvement to work better with multi scene workflows. With this update it is now possible all around to work with multiple scenes without issue.
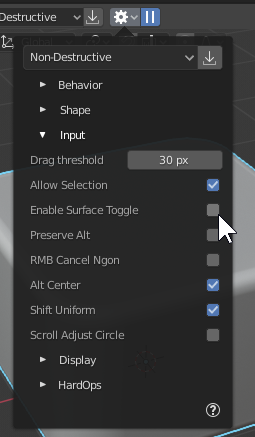
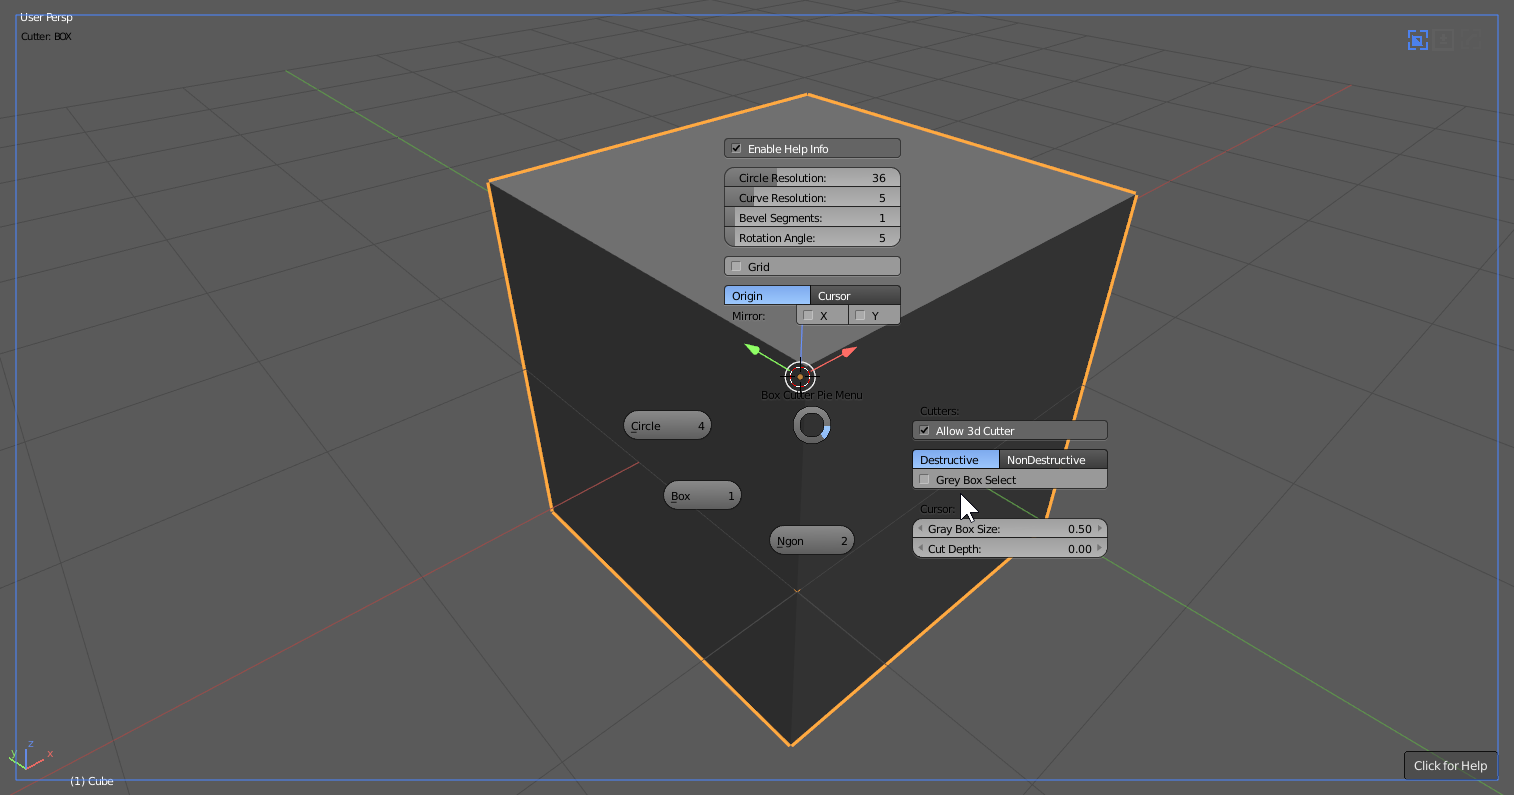
Sort Overrides

If I were asked what is sort, I’d reply it is the nanny state for modifier management. As with any system of automation it can turn against it’s human masters. For that reason we wanted to add overrides to sort.

Overrides in this context apply to the modifier name and prefixing it with a character.

Space – Ignore (will not be moved by sort)

Underscore ‘_’ – Stop (will not affect any modifiers past that point)

This is an advanced topic however is essential to all who work with modifiers. Sometimes when working you want to freeze or lock a stack from edit and this is that.

Sort depth also plays a role in overriding sort.

The goal of sort is to have something powerful, effective, and behind the scenes assisting with modifier management. Eventually it won’t even require awareness due to just doing what is needed but sort is there for you if you need it and can be disabled with ease.

Ortho View Align

This option allows for view align to be predominant in orthographic.

Autosmooth Adjustments

Make, Knife and Extract will no longer adjust autosmooth on the target.

This makes boxcutter a little more reasonable in cases where it is not needed like subdivision conversion.

It became apparent through casual use that having auto-smooth set by knife operations is not only illogical its not what Blender would do for sure. Extraction is a non-cut operation and thus should not affect the target at all at any time and make is just a make based on the surface of the target so adjusting it’s autosmooth was unnecessary.

I probably should have realized it then.

Now autosmooth never has to be off for me.

In Closing P1

And with that the Boxcutter 719 event kicks off. However before closing I’d like to recap some of the buildup to this moment worthy of the release log so will be included now.

I hope everyone enjoys the latest update. We continue to put our all into it. I am forever grateful to the team for the continued efforts despite life, despite setbacks. It is in adversity that the true us arises.

Boxhelper Default (continued)

The initial pie was made on the inception of Boxcutter. Over time our needs have grown as have our need to present additional items to the user for a fluid workflow. The boxhelper was made to facillitate those needs and is now default in Boxcutter.

For users attached to the pie an option exists to go back to the classic style as well.

Static Grid – Shift + K

Static grid is the alternative of the dynamic grid in boxcutter. It also has a few extras that the classic grid does not. For example, shift + K will knife project the grid into the mesh allowing for quick grid cutting if needed. As of 718_12 it has the ability to cut individual faces.

Custom Auto-Proportion 1:1 Mode

Custom once played by the rules of box which I had issues with. Box requires 2 maneuvers before extrude while I felt custom should be 1 gesture period. Including extrude / lazorcut (cut through).

Auto proportions can be enabled in the Boxhelper or in the behavior panel.

If desired one can still draw with box behaviors and flexibilities.

The goal is to ensure that when a custom cutter is used, the proper proportions can be had without hotkeys and depth be provided automatically. Resulting in a 1:1:1 cut.

Even Ngon supports 1:1 behavior.

Autoflip X/Y

If a shape is pulled over itself, it should flip. That is all there is to it.

Easier said than done but now it is a thing.

Dimensional Recall

1:1:1 recall. Just like with custom I need to recall shapes in the same form they were made.

Reverse Bevel Recall

Reverse bevels are easy to make but not so easy to recall. A long road was walked to get to this moment but my eyes remained on the prize. To recall a reverse bevel shape without flipping, unintended normal correction or deviated from the initial shape.

Ctrl + R – Rotate By 90°

Shift + ~ will rotate a shape inside which is useful when keeping the bounds but sometimes you need to flat out rotate the entire shape. That is where ctrl + R comes in.

Inset RECUT Return

I am well aware of the difficulty with inset. For that reason a playlist was made.

Recut is a way to base an inset off of the initial unmodified mesh. This expands the usability quite a bit and is needed for the success of Inset. I am happy to announce it is back greater than ever.

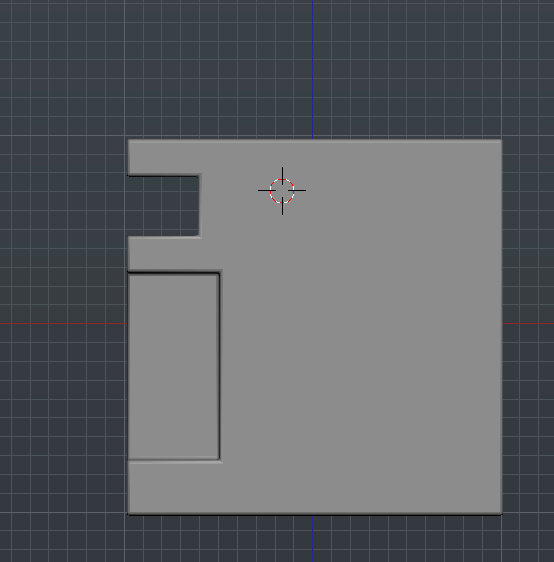
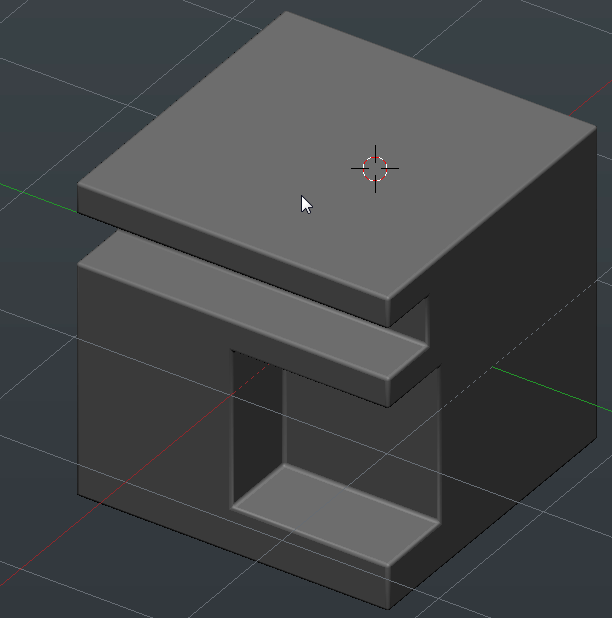
Box Grid (cut) Backface

I want grid to align. However I also wanted grid to cut. With our grid cutter is became apparent without backface the separations wouldn’t behave properly.

A small thing but essential to Boxcutters grid cut.

Someday I wanna cut grids.
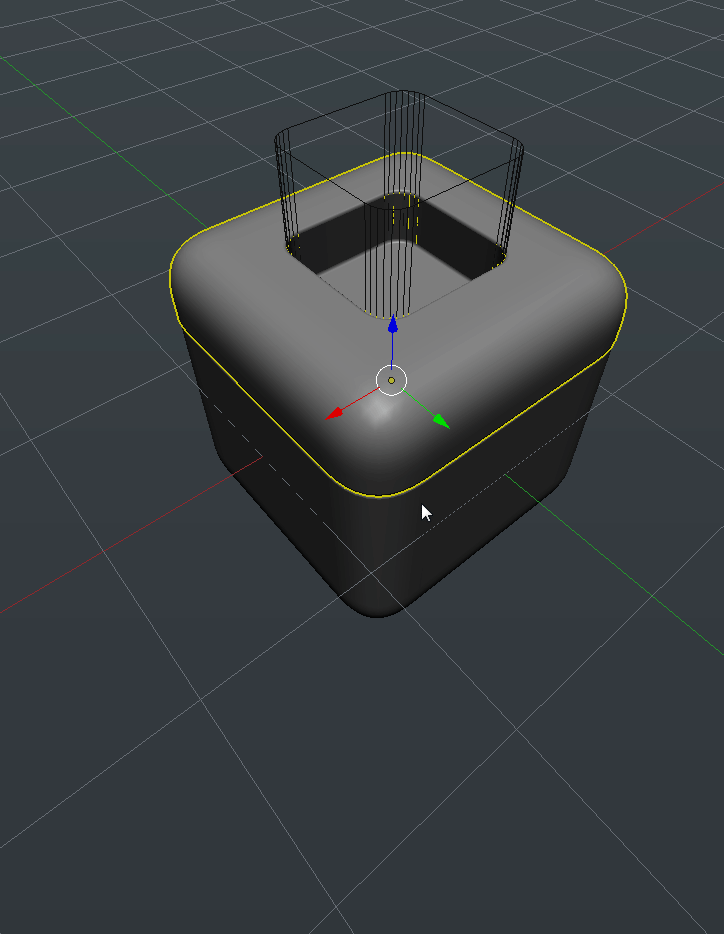
Perfect Wedge

When it comes to wedge it needed a method to make perfect wedges. By holding ctrl on extrude it will jump to the proper wedge amount to remove the guesswork.

Wedge is just handy when needing to make surface differentials. Any shape can be wedged from circle to lasso. Just press W.

BC_transformer (Improved Clone)

The bc_transformer is now capable of duplicating more shapes than ever including radial arrays!

Circle (P)

To reverse bevel a circle a new circle had to be made.

There is much to this circle compared to the previous which explains why it is the new default circle.

Sound Effects Forward / Back Buttons

Sound effects can now be forwarded or reversed to previous sfx allowing for user to try and experience them more fluidly.

Extraction Fade

Extraction needed a force feedback to indicate the action used. Extraction fade aims to fill that hole.
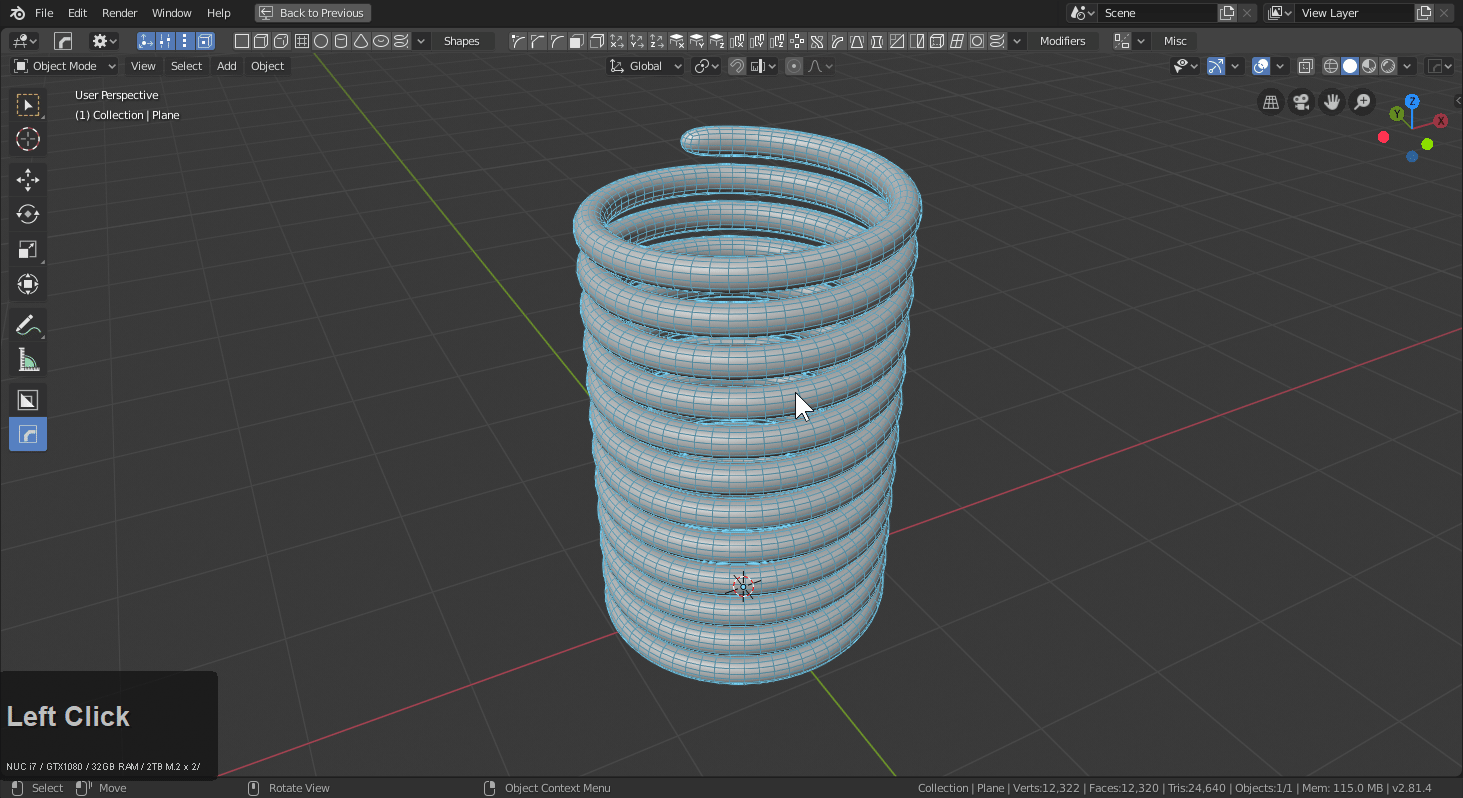
Dynamic Grid V3

“Don’t get me started on grid”

The dynamic grid remake was quite the undertaking. In retrospect, It was an adventure but repairing a central pillar is never an easy task. I applaud the work of proxe and loof towards getting this to come out in the form desired. For those requiring something more classic there is static grid.

In closing P2

Alot has happened with Boxcutter to this point and we are nowhere near done. There sits a couple of things that await deployment but the question is how to fit it together cohesively leaving the most minimal of holes. I hope everyone enjoys this latest version and if you are interested in the progress up to now, a playlist has been prepared on the topic.

Hard Ops 00983 Update Log

I am pleased to announce the release of Hard Ops 00983 : Curium.

Also docs are being updated.

Banner image by the legendary AR – creator of hopsTool

Thanks Adam Krol for his work with the icons of hopsTool in such short notice.

Shoutout to Sir Charles for the release ad vid. Also on short notice.

This release brings more stability and improvements to the table so without further ado lets dive into whats new.

Updating / Installation

Returning customers.

Blendermarket / Gumroad / Installation / Topbar

Boxcutter also received a small update to ensure cross compatibility.

N Panel

The N panel has been updated with the mini helper and accompanying functions to make HOPS more accessible.

Also to be more persistent than the mini helper which can be problematic at this time.

BSL9BKXu1K.gif

Its can be nice to have a modifier panel that can go away with the N panel.

This will be key for later and keeping up with modifiers in fullscreen. I tend to keep an eye on my stack to ensure modifier placement is optimal for my needs.

Circular Array

Circular array was a popular request so it has been added. It has a couple of different ways to use.

First there is just simple circular array.

1FGqQm7mtn.gif

Then there is 3d cursor circular array which was intended for assistance with things like Boxcutter.

gPkvt4qe2C.gif

The 3rd state will not use the 3d cursor and will launch the user into displace allowing for quick positioning.

BDGDC0yrjv.gif

At this time adjustment is done via array and displace modifier modals. This will be streamlined in the future but for now our next feature will have to do.

hopsTool

Introducing hopsTool, the first active tool of Hard Ops. This is the first part of a new system that we have been working on. AR put an immense amount of work into this tool and I am immensely proud of what he and Proxe has accomplished.

Final ordering of modifiers may differ in final version.

Hotkey: Alt + Shift + W

Also can switch on alt + W if latest boxcutter is installed and alt + W hotkey is turned off.

blender_If4F5Ji2U3.png
Toggle option for hotkey in boxcutter. Disabling this will lets alt +W switch BC and HOPS

blender_HnKUcb1cn3.png

When activated a topbar will appear up top.

blender_4ePuluaGbW.png

Below is a breakdown on what these options mean.

JLIrD02Vh3.gif

Display – chooses which dots will show during ctrl in this state

Shapes – hShapes or modifier generated shapes that serve as a starting points.

Modifiers – modifiers can be added to the shape and controlled in the 3d view using gizmo dots.

Misc – just mirror for now.

You are also able to make the topbar list smaller via lists in the behavior panel.

XC1laBSIDC.gif

To showcase the idea of the tool in action.

gq0npnwt43.gif

We understand there being some limitations with how the instructions are conveyed and are working on ways to improve it but in the meantime I can only say the more time you spend in it the more fun it becomes.

wa74MW9kRA.gif

The dots showing up on ctrl in this example are used to adjust various screw, solidify and bevel modifiers. When bevels are present they stick out of the corners with subsequent levels racking up more corner dots. This should make tweaking multiple levels of bevels easier and more intuitive.

These dots are only showing during hopsTool. Exit the tool to get out of it.

Like boxcutter / hopsTool can be exited with W or choosing any other active tool.

5E6X8BSF2u.gif

With hops tool procedural creation should be fun and enjoyable.

NKSfPnqXXT.gif

So the reason some mods have multiple buttons is due to operational differences with the system we aim to create. Someday they will work as intended and put the dots in the right places for the goals we aim for.

Even more interestingly you can ctrl + click a dot to adjust the specific mod or to fine tune properties using the mod itself.

The final cherry of this release would have been tool-tips but the tool-tip timer doesn’t update until the mouse is moved so a workaround system will have to be found.

When changing values on mods rapidly crashes can occur. There are know issues and limitations with the tool that we aspire to improve upon in the future. Also save frequently.


Boolean Dots

hDots also support booleans. This should make the boolean process a little easier and more intuitive.

With 2 object selected you should see 3 new dots.

Cut / Union / Slice

37bW28ms9h.gif

Boolshapes also get their own dot which is where things get really busy.

Fade distance can be adjusted if needed and booldots can be turned off if they are getting in the way.

kTAlB98LCc.gif

This should come in handy for recalling specific boolshapes to modify.


hDot Tips

Perfect dots for your setup

Of course dots have a behavior panel for fine tuning behaviors.

blender_IOO6uuyEEr.png

In this prop you can adjust the scale and offset depending on monitor. You can also change the colors in preferences.

blender_yPVdYbGI2d.png


Ctrl + shift clicking dots allow for alternative modification.

Bevel dot adjusts the width but ctrl + shift allows for segment adjust.

The info text up top lets users know whats being adjusted.

1VXXhCmdpN.gif

On screw ctrl + shift left click dragging adjusts the steps in screw.

Yf6YfXUfEU.gif

Simple deform also gets dots for making large adjustments on the fly.

UYdM8swKVw.gif

When using hops tool w/ boxcutter and racking bevels the ctrl + add mod behavior adds a mod at 60 degrees which is smoother for going to box city.

W4RZOOIPQs.gif

The n panel can display your mod stack so get in there and look at the mods.

pZLPrAutVn.gif

If you get confused about how a shape is constructed just mod scroll it.

nxVAopuk2e.gif

Try starting off with a vert!

A vert can be a fun time for getting started and experimenting with non destructive shape creation. It’s also fun getting creative with decimate and mirror to create dynamic base shapes.

viQ75QS6tH.gif


In Closing

Various bugs with scrolling and slash has also been resolved. We tried to make this release more stable than previous to set the foundation for what is to come.

The initial rough versions of new tools are always rough but I am eager for what this system will become. I like to imagine dots as placeholders for future plans of sliders and rounded icons that lets users know what mod is being affected. When this system was first added it was quite rough. After many passes by each of us it is now ready for this first release.

We hope you enjoy Hard Ops 00983.

I hope everyone is playing Astral Chain.

Boxcutter 6.9.0 : Poly Dirk

This is the final-ish Boxcutter for Blender 2.79+.


It is recommended to update to the latest build via the buildbot. Users have reported issues with 2.79B. If you are having issues with 3d box crashing please try updating Blender. This has been found to resolve most of the issues.

The next update will be for 2.8.

Boxcutter has had a few small changes and improvements mainly bugfixes.

The D menu has been adjusted and a new workflow mode for Destructive and Non-Destructive is in the pie menu.

blender_2018-09-24_18-59-05.png


Destructive

Behaves as classic in red box 2d/3d. Just cuts and is done.

2018-09-24_17-18-16.gif

Yellow box is also connected to desctuctive / non destructive.

2018-09-24_17-19-27.gif

Non-Destructive

Booleans are kept as modifiers if shift is not held.

2018-09-24_17-21-54.gif

Yellow box also has a non-destructive counterpart.

2018-09-24_17-22-57.gif


Grey Box Deselect

This one was requested by Jama.

blender_2018-09-24_19-03-10.png

Grey box deselect will auto deselect the grey box allowing for rapid grey box creation.

2018-09-24_19-04-18.gif

I can’t wait to see what is done with it.


Autosmooth

For those who use Boxcutter without Hard Ops >> SSharpen. Boxcutter now sets autosmooth for those who cut the greys. Just better shading.

2018-09-24_19-19-09.gif


There are many additional bugfixes in addition to small enhancements.

  • NGON doubleclick error

  • HOPS not present error

  • dead boolean error resolved

  • boolean naming convention

  • low level boolean application

  • local mode fixes

  • 3d box improvements

  • hops integration matcut improvements


We hope you continue to enjoy Boxcutter and report any support issues to my email (masterxeon1001@gmail.com).


blender_2018-09-11_19-06-52

Hard Ops 0094 Update Notes

It is with great pleasure that I release Hard Ops 0094. This version has received a few small enhancements that are worth explaining in detail.

QHelmet4_3cc

Also the docs are always being expanded and more video content is to come.

Tooltip Displays

Now most tools have a tooltip explaining what it does. I hope this makes things more clear.

2018-01-24_05-50-35.gif

Fidget Integration

Fidget is pretty detached from HOPS and BC and is more of an experiment. However Hard Ops has an alt + V menu for viewport and Fidget pops up there was well if present.

FIDGET is a separate product that can be downloaded and installed similar to our other tools.

Fidget has many shift + w options in the node editor for mapping HOPS commands so give it a try!

2018-01-24_05-52-38.gif

Fidget like boxcutter can easily be closed with esc. Fidget will get documentations and its own blog post at a later time.

Edit Mode Booleans

When it comes to integration with new features I usually wait and experiment before integrating it in order to make sure it doesn’t disappear or change dramatically.

In edit mode you can select an object and press ctrl + alt + numpad minus or plus to union or subtract geometry.

This is less dynamic than object mode booleans but it offers exciting new possibilities as well.

2018-01-24_05-56-46.gif

Red / Green Boolean System

Previously Hard Ops had an immense amount of focus on setting up booleans then applying them. Over the course of recent work it has become needed to keep them dynamic for a little longer than previously.

To show in action. This is the classic behavior.

2018-01-24_05-58-48.gif

In the Q menu pending boolshapes will have an option for green / red.

Green will allow it to go on and be applied.

Red will stop it from being applied and allow for more adjustment.

2018-01-24_06-01-09.gif

Notice I changed it to red to stop it and keep it dynamic and live and back to green to then apply it and continue.

Sculpt Mode: Brush Menu

If you press Q during sculpt there are now options based on sculpting. This will be expanded in the documentation but is worth a shot!

firefox_2018-01-24_06-03-13.png


Mirror Rewrite

Sounds boring. Why is it last? Because it’s the best.

Previously Hard Ops used a combination of symmetry systems brought together but still was complicated.

Symmetrize which we modified to our needs.

Mirror Mirror a previous tool I was involved with. Now built in.

Automirror by Lampagne which was great however unification was the ideal method. So this tool is no longer needed.

The modifier helper is brought up with ctrl + ~.

blender_2018-01-24_06-08-16.png

The modifer helper lists the modifiers present on the selected model.

Materials and misc are the other 2 tabs. Lets look at the misc.

blender_2018-01-24_06-09-21.png

Expanding mirror options we can see there are now all options built into Hard Ops. And the best part is the fact that its listed in the helper means you can configure the behavior before the tool is used.

Mod – adds a mirror modier

Bisect – splits the mesh then adds the mirror modifier

Symmetry – similar to symmetrize and is a form of one and done destructive mirroring

Relink – relink will create a group instance mirrored on the negative axis of an object. This one is a form of mirroring which uses no modifier and is a group instance.

The mirroring rewrite was the biggest part of this latest update. I hope all the users come to enjoy it and without issue.

I must personally thank AR and Proxe among the many others who email me for their assistance. Its amazing this tool is still going and I hope to unveil many more ideas before we tie the bow on it!

Next up! Boxcutter!

blender_2018-01-24_05-25-03

Also damn that Eevee is looking nice! I can’t wait to port HOPS over!

Hard Ops 8: Polonium (P4 Update)

Hard Ops 0084 can only be used with Blender 2.78 and above.

There is also new WIP documentation.

I also made an art dump of all the stuff I made using Hops8.

Hard Ops 8 has been the longest release of the series and continues even now as we use this number to focus on enhancement and stability.

As Blender 2.78 gets closer we also try to refine this version for public consumption. With some internal changes glitches can be expected but we are working to resolve them. Currently it is still in testing stage and is the top file of the Gumroad at this moment.

As issues are being reported and resolved and 2.78 comes closer it will be on the BM as well but once 2.78 is out.

Machin3.png

Kudos To MACHINƎ for allowing his drone to be the ad for this version. He is also selling it as an asset. I recommend giving it a study if you’re interested.


B2(1).jpg

A series of additional menus and panels have been added. The center and foundation of Hard Ops has always been the Q menu. In time I am sure we will no longer need the shift + Q hotkey and the pie and menu will toggle from the Q hotkey.

Sculpt Mode now has a Q menu.

2016-09-12_18-32-48.gif

In it’s current form it also has the view port menu attached which means if you choose matcaps as the option that matcaps will appear as an additional box.

In fact in the Q menu if you go into Settings >> Viewport the same functionality also exists.

2016-09-12_18-35-12.gif

Alt + V also brings up a viewport menu in object mode. This was just an experimental feature that was added that grew on me as I used it more and more.

2016-09-12_18-36-43.gif

Cameras also have a Q menu. With handy options.

2016-09-12_18-38-43.gif

Lattices also have a Q menu. My favorite is simplify.I use it to reset lattices to their simplest points and start over with deforming.

2016-09-12_18-41-40.gif

Alt + M brings up a menu of all the materials in your scene for fast assignment. This is for object mode of course since edit mode would merge geometry. This is also experimental but has proven useful recently.

2016-09-12_18-43-49.gif

In preferences there are additional properties for the HUD and how long it displays. That way you can adjust this to your liking.

2016-09-12_18-46-49.gif

Merge has also been updated a bit. While it is still being worked on we examined the naming and decided it was best the way it was.

When you select an AP and the mesh to merge with you have 2 options.

Soft Merge – merges with mesh while keeping it live. This allows for tweaking then for completion just select the main mesh and choose Q >> Csharpen.

Complex Merge – merge and is done. Places the OB. Deletes the BB and the AP. This is the option I would normally use.

2016-09-12_18-48-51.gif

So it’s just Cmerge and Smerge. In addition to this the inserts are being expanded with new ones for users to have fun with.

Mirror Mirror now mirrors across any object not just meshes. This is similar to the original mirror mirror and was a mistake on my part.

This is useful because sometimes I mirror across an empty. As a recap mirror mirror has been internalized into HardOps so the plugin is no longer needed.

2016-09-12_18-53-39.gif

Settings menu is a little cleaner. We discuss all the features often and what can be removed / enhanced / etc. All the remaining functions are near and dear to me even if the other teamsters don’t even use them.

blender_2016-09-12_18-55-49.png

CSplit / CSlice now behaves better. If a mesh isn’t beveled you can slice and it will respect that. This has also carried over into box cutter and it’s behavior with unbevelled meshes.

2016-09-12_18-58-00.gif

This can be handy for using the Cslice as a more utility function for alternate workflows. I like the fact that you can also use the status reset and then have cuts ignored by bevels.

2016-09-12_19-00-12.gif

Q >> Meshtools >> Sstatus Reset is quite a useful option when used correctly. I am unable to explain all cases in which you would want to reset your mesh to dupe the system but it has come in handy on more than one occasion.

As this post has gone on I am keeping the best for the later part. Now that the boring stuff is out of the way we can go over some of the larger changes.

The T panel has underwent changes again. This was done for stability and ease of use. There is also a learning tab added for new users. On a technical level this has made things more stable and it has a connection with the other menu systems with make it easier on us internally.

2016-09-12_19-04-39.gif

XUnwrap now behaves on multiple objects at once. I tend to manually unwrap hero items but for secondary stuff or quickies XUnwrap can be useful for quickly getting a mesh out to Substance Painter or a game engine.

Select your objects and press Q >> Meshtools >> Xunwrap

As you can see through the uv preview that both pieces are placed uniquely on the same UV space.

2016-09-12_19-08-21.gif

2d Bevel was an idea based off of the mesh cleaner for bevelling 2d shapes. I must add… DO NOT USE ON 3d SHAPES . If you do that the results will be different. I must also stress the importance of modifier stack order as well with using this since it can have issues. I consider this an experimental feature.

2016-09-12_19-12-52.gif

In this example I used 2d bevel then Tthick to add thickness on top of the bevelling of the 2d shape. All it does it round corners using a limited dissolved mesh with a bevel set to only verts.

CleanMesh(E) is also a new feature that has been added. This will do a limited dissolve / remove doubles operation on the mesh. I cannot stress that this is for planar-ish meshes and will not give good results where linework is specific.

Also make sure you check pro mode under preferences to enable it. Since it is an experimental option.

2016-09-18_13-32-23.gif
Enabling Pro mode to see Clean Mesh in Q menu

Clean mesh will dissolve all useless edges. This can be useful for simplifying meshes for boolean operations.

2016-09-12_19-17-09.gif

This is something I think it’s best to experiment with and try out. It can be useful having useless edges dissolved when it comes to simplification.

These two videos have portions where I am experimenting with the simplification of the CleanMesh(E). Sometimes this can also make booleans easier to perform due to there being less errors. If you are using guidance loops for control then you may not want to use this on the main mesh but like I said use it at your own peril.

So with that I conclude this post and have fun operatives! Big shoutout to AR. He’s been down since the beginning and continues to be a big part in the shadows. He also rendered the apartment ad for HardOps.

loft2camera3ad.jpg

loft2camera3.jpg

Moth3r created the gun image which also was an Hard Ops ad.

Ivan(HSGun).png

As always it’s the operatives that keep this tool alive and kicking. I cannot stress how important it is to experiment with the tool and find a unique way of your own for using the tool. I often find people using it in strange and unique ways that get results far beyond even my expectations. Alot of the features I feel extend past hard surface modelling and are just the way I wish some things behave. It’s a understandable impression that Hard Ops is primarily a hard surface toolkit but it’s also a workflow assistant.

The WIP manual is always being updated. I will begin making it the final documentation for hard ops so please check on it occasionally for additional information on how to use the tool.

Inspired by Machin3 and his tips on Hard Ops I was inspired to make some drones!

So get to work operatives! Box Cutter 4.5 coming soon!

2016-09-18_03-41-48.gif

2016-09-17_22-47-51.gif

Drone2oct1-5.png

Drone2Kitteh.jpg

FoxitReader_2016-10-07_14-14-14.pngFoxitReader_2016-10-07_14-13-09.png

Hard Ops was featured in 3dArtist Magazine Issue #99!

Box Cutter Guide V1

Box Cutter is released! https://gumroad.com/l/BoxCutter#

https://gumroad.com/js/gumroad-embed.js

Legacy Hard Ops users will of course receive a discount.

Box Cutter is a brother of Hard Ops and a standalone product.

IF YOU HAVE THE RED BOX DEMO ONLY THE RED BOX IS AVAILABLE.

To start it press alt + w. To draw a sub box press ctrl + left click and drag. It requires a selection otherwise it uses the selection lasso.

BoxCutter is a secondary project focusing on cutting with a different perspective than the toolset we all know as Hard Ops. They are intended to be used together however separately they still work albeit behave differently.

Starting box cutter after enabling the add on is under the hard ops T panel.

2016-04-25_18-09-19

The t-panel is worth looking  into.

blender_2016-05-01_08-18-59

This step is important since it allows the sharpening to happen after cutting. The beveling and sharping helps in differentiating the shapes easier when they are the same color.

Also Hard Ops received a last minute update to support box cutter in the Q menu under mesh tools in object mode.

blender_2016-04-25_18-13-57

The last one isn’t necessary however it’s there for additional functionality. The hotkey at the moment is Alt + W.

In total theres 3 ways to start box cutting.

Alt  + W

T panel >> hard ops

Q >> Mesh Tools >> Box Cutter 

That is as easy as we can make it.

Now for the complicated stuff but very fun stuff.

Firstly when you are in box cutter the screen has indicators. This is important. Very very important.

blender_2016-04-25_18-21-39

The box on the right is AR’s idea of indicating Box Cutter mode. I wanted it red but haha its grey. On the left is the Cutter indicator.

This is something you want to be aware of.

D – changes mode (Box , Circle, Ngon) for now (while in box cutter state)

Esc cancels

So basically in Object mode you can use D to change cutter mode. And cancel with escape. You want to cancel when you aren’t using it since we currently are still dealing with it. You can open multiple box cutters on top of each other by accident. Which is unexpected and unwanted behavior.

So now lets get cutting!

2016-04-25_18-28-01

Holding down ctrl allows for you do cut out a shape in a box that you draw.

However this has a modifier to it as well. Holding alt while drawing makes it cut to the depth level of the 3d cursor!

2016-04-25_18-31-08

This is quite an interesting behavior when you want to control depth however we are still examining other options. But there is more to it than even that.

If nothing is selected you can draw a white box. This is just for creating a quick box.


2016-04-25_18-34-58

With nothing selected it draws white boxes and with a selection it draws a sub box. If you hold ctrl + shift when drawing with nothing selected you will draw a box from the 3d cursor’s position.

2016-04-25_18-37-00

This behavior is intended for speed so pressing things without being aware can make for a crazy experience. Kinda like opening Zbrush for the first time.

While the sub and additive brushes seem awesome the real favorite for me is the slicer. This brush will slice out the mesh into a new section similar to the rebool but with a whole different perspective.

2016-04-25_18-40-44

Holding ctrl + shift will bring up the slice/rebool box. The same modifier of shifting to alt during still applies for cutting with depth. The way Box Cutter is setup is that you can make quick cuts in quick succession then go in for the kill with finer detail and Hard Ops based workflow.

Admittedly this will take some practice but hey this is version 1. As with Hard Ops we plan to make large improvements over time and refine it the level of what we consider “finished”.

When it comes to the art of cutting in Blender it goes without saying that guidance edges are as important as ever when it comes to performing booleans successfully. So additionally the option to fast bisect has been mapped to ctrl + D. Pressing it will take you into an edit mode setup where you can quickly click drag and bisect.

2016-04-25_18-48-56

For this basic example it is overkill but in the thick of things this is a very useful tool to ensure your bevels and booleans are working together. Otherwise this method of creation can become a game of luck when eventually you hotline and have to undo.

Additional shapes exist with the same behaviors like ngons and circles however they are more experimental at this time.

2016-04-25_18-54-27

Ngons exist too but they’re my least favorite at this time. And also are the most experimental.

2016-04-25_19-06-39

You have to click to start which provides no feedback until the 3rd point or so. This behavior I feel will be the hardest to get used to however it is available for those who want to use ngon shapes.

We still have much more planned on expansions for this in the future so stay tuned for more information. This wiki is a bit short at this time however a more detailed one will follow.

2016-04-25_19-04-29


Notes. Esc ends box cutter. End box cutter before closing your scene or opening files. The red border is to let you be aware of box cutter mode. So you don’t accidentally press alt + W twice.

Setting Up Blender For Success

When it comes to using Blender I feel that the user experience presented is as important as the tools when it comes to working in 3d for extended periods of time. I always talk about what I call setting yourself up for success, or starting Blender in a way that doesn’t hurt the eyes.

While I personally try to keep Blender as vanilla as possible I felt it would be good to make a post discussing my default scene and workflow.

When it comes to storing your default scene. Its as simple as ctrl + U in the 3d View. You will get a box confirming the save which will ensure the next time you open Blender it will be exactly like that. This is important since you don’t want to have to deal with mapping every time.

Ctrl + U – saves user pref

Ctrl + Alt + U – open user preferences

The first SFQ to take care of is my theme. I don’t download themes from other places because then I’d have to link them but the defaults that come with Blender suffice. I am also using the one from Steam so your themes may differ. Just go in user preferences and change it. Its refreshing to change it from time to time to something that matches your mood or project. It helps me get into the zone.

2016-03-30_20-04-00

While you’re in preferences I also enable the plugins I need and set up Cycles to use my GPU under cycles but thats beyond the scope of this post. However I do want to point out some useful things that might be worth pointing out.

2016-03-30_20-07-11

In the 3d view of user prefs there is an area where you can adjust the size of vertices and outlines. In certain cases where the geo isn’t very dense I like the larger verts. Just something worth checking out sometime if you haven’t.

2016-03-30_20-10-11

Enabling region overlap allows the T and N panels to be transparent. This is also handy for being able to close and open the panels without interrupting view-port renders plus it looks futuristic!

2016-03-30_20-13-20

Strangely enough. I also like setting my smooth view up high like 800 so the transitions from the numpad keys are gradual. Also the numpad period focus (.) is also more graceful. These things are cosmetic but it makes Blender feel more tactile to use.

Now at this point I also want to discuss quick prefs. This is an add on that you can get here.

https://wiki.blender.org/index.php/Extensions:2.6/Py/Scripts/3D_interaction/QuickPrefs

Once installed and enabled you can use this to change the default viewport shading. Personally I find this to be one of the most essential cosmetic changes I do to Blender.

2016-03-30_20-20-35

Between the default and the Dark Grey the way the forms are being presented are much different. As strange as it sounds, I feel this improved the quality of my modelling immensely just due to the fact the initial presentation of default shaded meshes might not be the most efficient for someone like me.

If your thought is, “Why not matcaps?” Well. Do that. But I prefer the feeling of the Dark Grey. So this is turned on by default and set as my default scene so now we are almost set.

The next changes are strictly for those who model with this sort of workflow and may not be efficient or handy for everyone.

2016-03-30_20-25-56

Select boundary loop is remapped to shift + ` in edit mode. This allows me to make quick selections and then get the border only. Its very quick for panel related things.

The other is mapping the mark sharp and clear sharp to alt + and shift + alt +.

2016-03-30_20-29-02

This is more of a preference however I find it useful in some situations not as many now that Hard Ops exists.

I try not to stray from the defaults too bad in case I have to use another PC or my settings are lost. So theres also pie menus you can enable to make life easier but so much additional workflow changes at once can make Blender feel alien.

Another thing is on layer 0 of my default scene is a material sphere.

2016-03-30_20-38-49

It contains materials for the blocking in phases of modelling you often see in my videos. When it comes to texturing I lean more towards PBR in my current work however having some basic materials can make quick modelling session alot easier. I gathered my materials from various sites like Blendswap and the B-wide Node collection.

http://www.blendswap.com/blends/search?keywords=materials&is_fan_art=1&blend_license=&render_engine=&sort=downloads&direction=desc

https://bwide.wordpress.com/node-groups/bwide-nodepack-for-blender/

I must also stress that having too much clutter in your default scene will make life harder so don’t go bananas gathering materials and building the hugest set of unusable materials on earth. Find those that work for you. Fine tune them tweak them and make them work for you. Alot of the materials I have I customize a small amount but collecting them is part of the fun. I’m sure everyone has better solutions for this as well however on my end speed is the game so I try to keep  it all flowing.

For PBR folks.

https://matthieubarbie.wordpress.com/2015/01/12/pbr_shader-1-75-for-blender-2-73-documentation/

http://www.quixel.se/content/blender/QuixelShader.zip


I hope this clears up some things about my default scene and helps you to use Blender more efficiently to your needs.

If you need more help with fundamentals or getting started, I did a free course! Blending away the pain!

https://gumroad.com/l/blendingawaythepain#

In that I go over everything I can from basic modelling / rigging to compositing. It’s just a fun trip around the program!

Also the beloved. Blender Basics Recap!

In my personal work I am moving into mocap with the Kinnect One and Pro Body 2!

Pro Body 2 – Download Trial / Buy

If you try it get the Xbox One Kinnect and an adapter not the one for Windows!

Hard Ops 007 Intro Guide


2016-02-23_09-31-55Gumroad customers… the file is in the gumroad. At the top. The latest files are always at the top.

If you have issues enabling it. Reboot your PC.

current install location:C:\Users\<USER>\AppData\Roaming\Blender Foundation\Blender\2.76\scripts\addons\

I tend to install by copying it to the folder. Not using the install from file in Blender. But whatever works I suppose.


________________________________________________________________ 

Hard Ops has experienced many changes underneath while attempting to retain the same philosophies that have been used over the course of it’s development.

The menus have been revamped with many new options and new icons thanks to Adam Krol or AK.

blender-app_2016-02-23_02-06-17blender-app_2016-02-23_01-59-39So the menus have remained the same on the main level for the most part however the options inside are where the real changes can be found.

Its important to remember in Hard Ops.

The first 3 options are the recommended options. You should use those however if not you also have operations where you can use options that aren’t in the top 3.

Meshtools, Inserts, and Settings are used less often so they are the bottom. Usually the first 3 do the recommended job in most cases so it also can be an indication of the mesh status. But that is a bit of work. How about we do you one better?

2016-02-23_02-10-51blender-app_2016-02-23_02-11-47Now the 3d view has an indicator in the corner for showing the status of the hard surface mesh.

In Hard Ops as far as the functions are concerned there are 3 mesh types.

-meshes that hard ops hasn’t touched intimately. Undefined meshes.

-meshes that have been Csharpened (thus beveled)

-meshes that have been Cstepped (bevels are baked but re-added)

Understanding these 3 mesh types will ensure your success with Hard Ops. One day the process will be made easier but it’s quite easier than it was in previous versions so progress is made with every release.

Also new to Hard Ops 007 is the on screen hud. This was added by the animation nodes master Jacques himself! https://www.youtube.com/channel/UC5ABAuGEvBMmau-1xJsNw6w There are quite a few superstars involved in this version and code wise its more solid than it has ever been. But of course expect bugs haha.

2016-02-23_02-18-38The hud was something I wanted for a while and based off of user feedback it seemed obvious visual feedback would make things so clear.

B-Width now has an onscreen indicator thanks to Jyri http://blenderartists.org/forum/showthread.php?390354-Blender-Astromonkey in fact his postings were the reason I felt everything needed on screen indicators. He has been an important part of Hard Ops as well and was a major factor in this release.

Q-Array was added as the result of Jyri and further perfected by Jacque who I gave the code name Python because he’s a fierce coder. AR added the ability to set up 2 arrays at once on it then we realized we were making features we’d never use.

T-Thick is now T-thick2 and has an on screen hud now as well. All the visual feedback is making my goals of fullscreen working closer to a reality.

This is just the beginning. The features list was beginning to get so long that it was hard to keep up with all the changes. So lets continue with the features!

It’s not uncommon that I request a feature that is met with “that can’t be done” or “python doesn’t go that way”. However the modifier helper is one such thing. This was first implemented by my good friend, product visualizer and fellow coder Claas Kuhn https://www.youtube.com/user/cekuhnen/videos

By pressing Ctrl + (`) you can bring it up in the 3d view and edit modifiers on the fly. It was further perfected by the Python to fix glitches and now it works perfectly.

2016-02-23_02-32-39The goal is to someday open blender and press alt + F11 for full screen mode and then alt + F10 for full screen 3dview. With this addition, the goal is even closer and I plan to expand on it even more to make the menu more useful. Many who are using the preview found this little Easter egg already by it is one of my favorite.

blender-app_2016-02-23_02-36-29


You may have also noticed the preferences section with recommended add-ons. I have always recommended particular add-ons for the utility and functions that they offer that expands on the original behaviors.

If you are missing an add on it will simply show you where to get it. No errors. However some options may be missing that are special experiments with functions for Hard Ops to play off of. I am a big fan of the Mira Tool for example so in edit mode there’s a quick option in the Q for using the curve stretch when present. However this is just an extension for convenience and experimentation so it’s all unsupported. If it works for you just have fun and enjoy the ride.

Auto-Mirror is another plug I am quite a large fan of. As a left handed artist. I made a small adjustment to make it accommodate. When present in Blender with Hard Ops additional options are unlocked.

2016-02-23_02-48-00
Symmetrize Upgrade

2016-02-23_02-41-42
Auto Mirror Menus


There is both a Mirror Helper popup window and an experimental option panel as well. Both of them function primarily the same however the open menu is a little quicker. It’s just something worth experimenting with as well. I enjoy the bisect and mirror behavior of the auto mirror so it’s utility in hard surface application was fairly self obvious. I do love the way it behaves.

That doesn’t mean the regular symmetrize hasn’t been left out. It has been updated with an on screen display and is now interconnected and rewritten from scratch. It also supports Cstep and Cshapen behavior so it can symmetrize and setup the mesh for cstep without messing up the bevels that were previously baked. This was something that annoyed me personally so I was glad to see it fixed.

There have been many overall fixes to the behavior and the psychology that was brought about with the introduction of the status mesh system.

What I mean by this is….

2016-02-23_02-52-30
No

2016-02-23_02-56-20
Clear Sharps HUD


When working in Hard Ops I assume by now you understand sharpening and stepping. You sharpen the mesh to perfect and set up the surfaces but once it’s detailing time you cstep it. You don’t go back to csharpen and ssharpnen then. Because the default settings will bevel your bevels. Which will never look good and can cause artifacting.

So now if the mesh is in cstep you can no longer use the sharpeners which is much better for the geometry and the psychology of the user. This update was added as the result of me watching one particular user. Who will remain nameless.

If you wanted to really reset the mesh to use the sharpeners you could always clear ssharps under operations. Which resets the mesh status.

In fact. Clear Ssharps has a hud now too. Everyone gets a hud this release. Sometimes I look over the plugin and ask. Who else needs a hud?

The addition of subsets was in the 0065 release.

These inserts are different than the regular inserts in both behavior and usage. Subsets are basically inserts that are built to be inserted within a surface and then csharpened or sstepped to integrate it into the surface. Personally I like to use cstep for this since it allows for individual bevel configuration in between bakes. However this is a finalization workflow. There is no going back. At least without a little pain.

blender-app_2016-02-23_03-03-33
Anatomy Of Subset


2016-02-23_03-10-01
Merge In Action


Subsets are made up out of 3 meshes. Subsets also insert always to the 0,0,0 of the scene and not on faces and at the 3d cursor like regular inserts.

AP which is what you use to set it on the surface and the merge. It is an X-ray mesh.

BB which is the mesh that is being cut out to make room for the…

OB which is the mesh that is being inserted into the surface.

This is a system I have been working on so I can expand its usage even further. However in its current state when you insert a subset. It selects the AP automatically so you have to do nothing.

Except hold ctrl and snap it to the surface. After pressing G to grab.

Then shift select the underlying surface and choose merge to finish the job.

The subsets are not built to be customized but are just me experimenting with different mesh systems so for those who long to add their own assets…

https://gumroad.com/l/kANV/#

firefox_2016-02-23_03-17-10

Wazou has played a major role in the initial insert system implementation however the idea of user added inserts have been taken to another level with Asset Manager or AM for short.

Users of AM will be pleasanly surprised to see that Hard Ops utilizes the AM plugin in its menus when present. You also have an option to turn if off if you wish to keep them separate. The support of AM was an important thing to me personally and even if it’s not present you still have inserts to play with. Consider our insert system a demo of what AM is capable of.

AM would be it’s own post and they already have documentations so check it out.

2016-02-23_03-19-34
Full AM Support

While we’re still discussing inserts. The classic insert system has been upgraded immensely and is using an entirely different system. When you insert meshes to faces they are already sharpened and have material groups for quick mat layouts. They also insert in a modal scale mode so you can perfect the size before applying.

The internal process of inserts was rethought and re-coded with an entirely different approach than before. Thanks to the python the inserts are more stable and better than ever. Not to mention the on screen messages and the auto grouping upon insert.

2016-02-23_03-25-25
Revamped Inserts


The insert system of Hard Ops is quite different than previous versions and also has a tear away version so you can have it on the screen for a moment. And thats not all!

There’s now an asset scroller for cycling through them without the big window. Just in case you’d like to try it.

2016-02-23_03-28-18
Asset Scroller


“The Python” implemented quite a few features this release and also rewrote many of the sharpeners to increase their stability and to get them to interconnect. So Csharpen calls on Ssharpen while Csharpening.

Rebool also has support for Cstep/Sstep mode where it will keep the mesh status.

Theres many small glitches that have been fixed for example the menu not showing when nothing was selected. Or the menu not showing when there were no objects. “The Python” fixed that.

The settings area has also had some additional parameters added for convenience. For example there is an option to rename an object. Or make the name display in 3d view.

2016-02-23_03-32-52
Settings Upgrade

These were more options that were an inconvenience to locate manually. However if you think that’s it, we’re only getting started.


In addition to renderSet improvements I also added a parameter for the cycles samples for times when I just want to boost it a little. If you select a camera the options are a little different. This was also something that I felt needed to be done since sometimes the N panel can be a visual mess to sort and find things in.

Under Operations there is a panel you can use to set the bevel segments on an object to something else. It has been surpassed in usage by B-Width but is still available.

Some of these options may seem excessive however they are just ideas to see how well they work. I might do a poll on how some of the features are working and see about removing some but that’s for later. I like the usage at this time.

The goal is to have some smart context menus that come up with Q for particular options with parameters that are useful to the users.


2016-02-23_03-38-13
Camera Q Options


The next topic is sure to cause some disputes.

The Pie Menus have been upgraded. As have the Menus. As have the Panels. In fact completely rewritten.

Since version 006 the pies have fallen into disrepair and behind on the latest tool enhancements. So we took the opportunity to rewrite their logic and make them behave like the menus themselves.

The menus are 3 options / Operations / More Options

So that same thought process was taken to the pie menus.

While the arrangement may seem odd this is AR’s take on it for the 007 version. It contains the same psychology of the menu with the arrangement being optimal for preventing the 3 main options from being the spotlight. There are also boolean options when multiple meshes are selected thus reducing the need for the 2nd pie menu. Also inserts show when nothing is selected.

2016-02-23_03-49-02
Pie Menus In Action


The pie menus had been ignored for a bit previous to this so it’s good to have them usable again. There’s even more feature and glitches to go over however this should suffice for an introduction to Hard Ops 007.

I hope everyone has been enjoying it as much as I have and I thank everyone for their support. Without the immense team you see in the credits and author list this plugin would never be what it is now. I hope that the future holds many more enhancements and improvements.

DeuxOctane12comp

Also demos galore!

So cubes are how I have come used to testing Hard Ops quickly. Over the course of this adventure I am proud to see these cubes looking more and more serious. I implore everyone to try on one before diving in just to make sure the tools are working as predicted. Its a hoot.

Hard Times And Even Harder Surfaces – Chapter 6 Demo / Timelapse

Chapter6Title1

Double Post Day!

In this chapter I want to go over something that I was taught recently by a craftier modeller than myself. And that man is Adrian Rutkowski.

Vitalii “Fructdw” Vlasov recently pointed me at his gumroad collection of assorted kitbashing elements and after checking them out I was blown away. For that I thank them both for this knowledge keeps my gears moving and knowing that there is always a better way.

Free Kitbash Set

https://gumroad.com/adrianrutkowski

The alternate ways that artists manage to make the tools work for them versus my ways and habits is always a welcome thing to see. Concept artists in particular are what I call “dangerous”. They enter 3d with a multitude of skills and an artistic eye that can’t be beat with pure 3d studying (or at least for me). I see so many concept guys open the door walk in and immediately begin killing it. I must admit I was nervous when I first saw how finely crafted and modelled each piece was. My first thoughts was that cad software was used and that these parts were not possible to make with precision and care to the edges and normals in Blender.

Now before we continue I also want to add. Forget topology for a moment. I know you’re gonna say, “What about UVs?” “What about deformation?” “What about sub-d?”. Lets leave all that alone for a moment and focus on just the shape and the form. In the end that’s what viewers see. Only us 3d folk see the topology and mapping. So if you want to clean up non subdivision parts be my guest but a concepter would craftily figure out a way to make it through the project without the nuances of technical holdup.

This is a timelapse demonstrating the techniques discussed in Chapter 6 of “Hard Times and Even Harder Surfaces” which is a patreon exclusive during development. Subscribe for this chapter and upcoming ones over at Patreon!

http://www.patreon.com/masterxeon1001

Also I wrote a blog post about freebies in the community worth picking up.

https://masterxeon1001.wordpress.com/2015/09/03/free-stuff-worth-checking-out/

All of them have freebies so go check it out!

Even I do! So pick up Blending Away The Pain if you haven’t already!
https://gumroad.com/masterxeon1001

Also I have been working on making finer and finer hard surface assets and if you get the asset collection you can check them out!

https://gumroad.com/l/assetcol

Image2

]